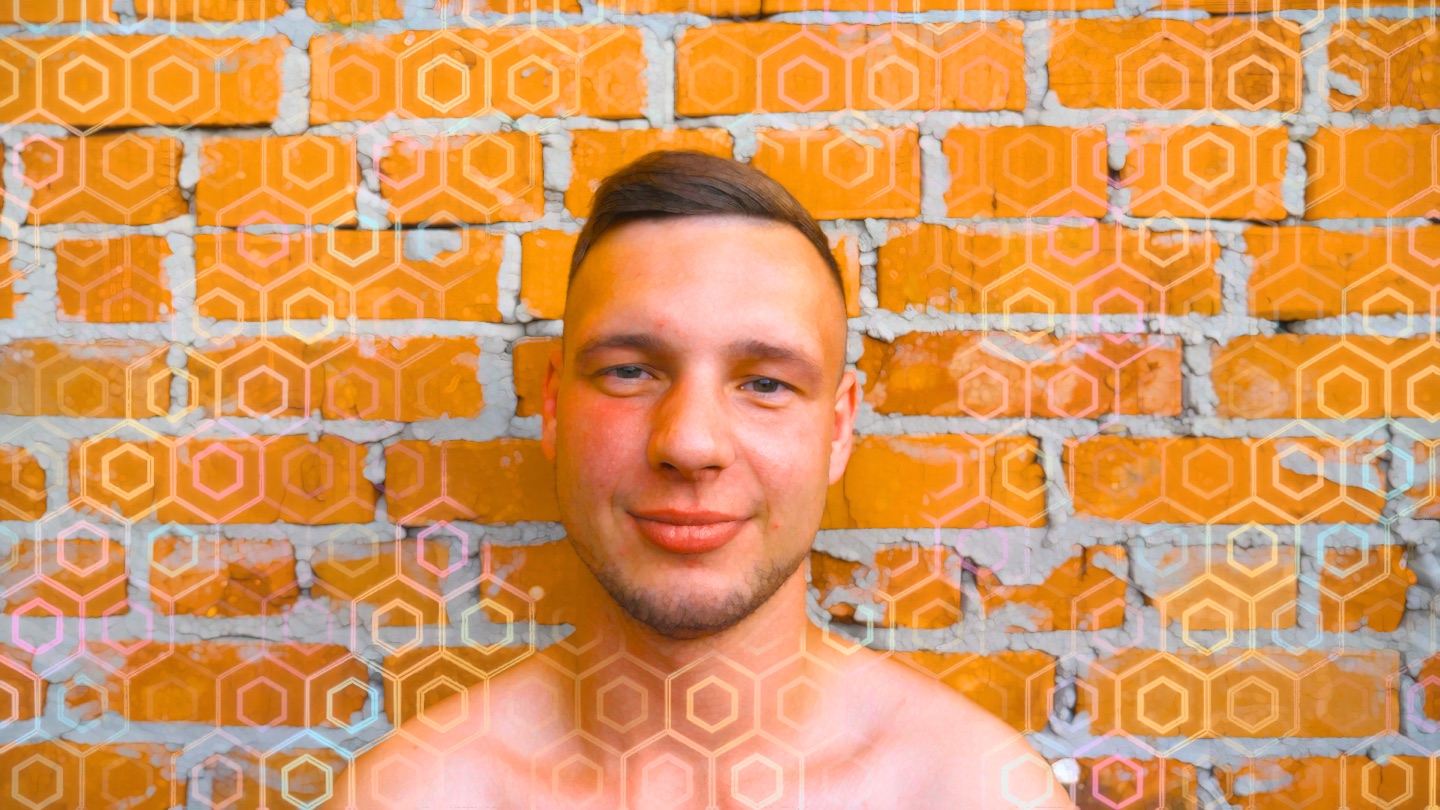
Download PDF
Visions icon
Realistic trip effectby Herbistry · for Final Cut Pro & Motion

Visions

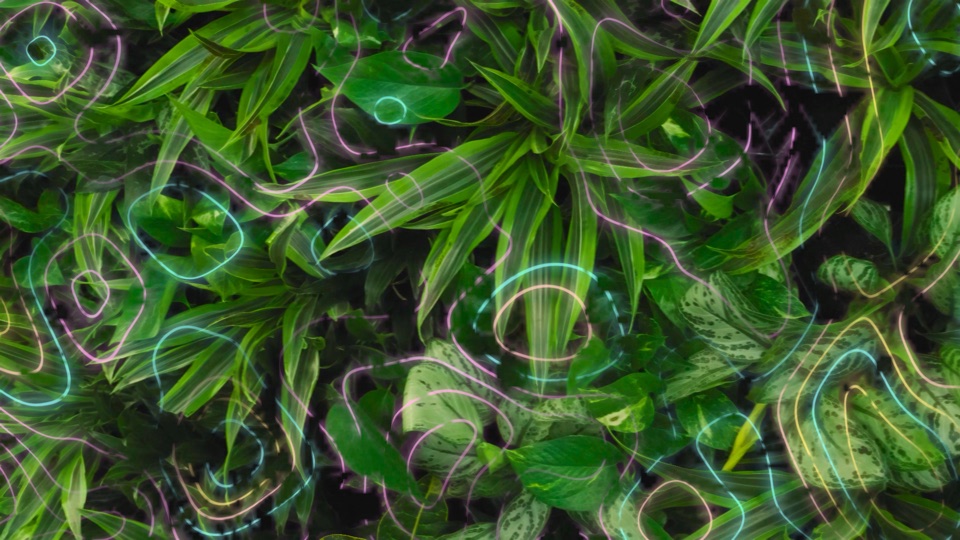
Your footage, slightly off in all the right ways. Visions brings the stuff people actually describe seeing: colors that get richer and wander, surfaces that breathe, trails off anything that moves, and geometry that grows on the walls and stays stuck to them. 16 looks to start from, from barely there to fully gone.

The short version

What Visions does

Visions doesn't paint a new picture over yours. It works with what is already in the frame. The colors you shot get deeper and start to drift, textured surfaces swell and swirl like they are breathing, anything that moves leaves a trail, and if you want to go all the way, geometric patterns grow across the surfaces and ride along with them as the camera moves.

It comes in two halves, and this manual walks them in that order. The trip (color, breathing surfaces, tracers) works on any clip the second you drop Visions on it. The geometry needs one click first: Add Geometry studies the clip so the patterns know where the surfaces are and how they move. After that they stick.

The trip

Works right away
  • Enhance: the footage's own colors get richer.
  • Color Shift: those colors slowly drift partway around the color wheel and back.
  • Drift: textured surfaces swirl and breathe. Flat areas stay calm.
  • Tracers: trails off anything that moves, while the subject stays solid.
  • Seven ready-made looks in the Trip group.

The geometry

Analyze the clip once
  • Three styles: Lattice, Fractal Tiling, Organic Growth, three forms each.
  • Patterns grow on textured surfaces and stick to them as the camera moves.
  • Periphery keeps a clean circle, say over a face, and Follow Subject keeps it there.
  • Nine ready-made looks in the Geometry: Analyze first group.
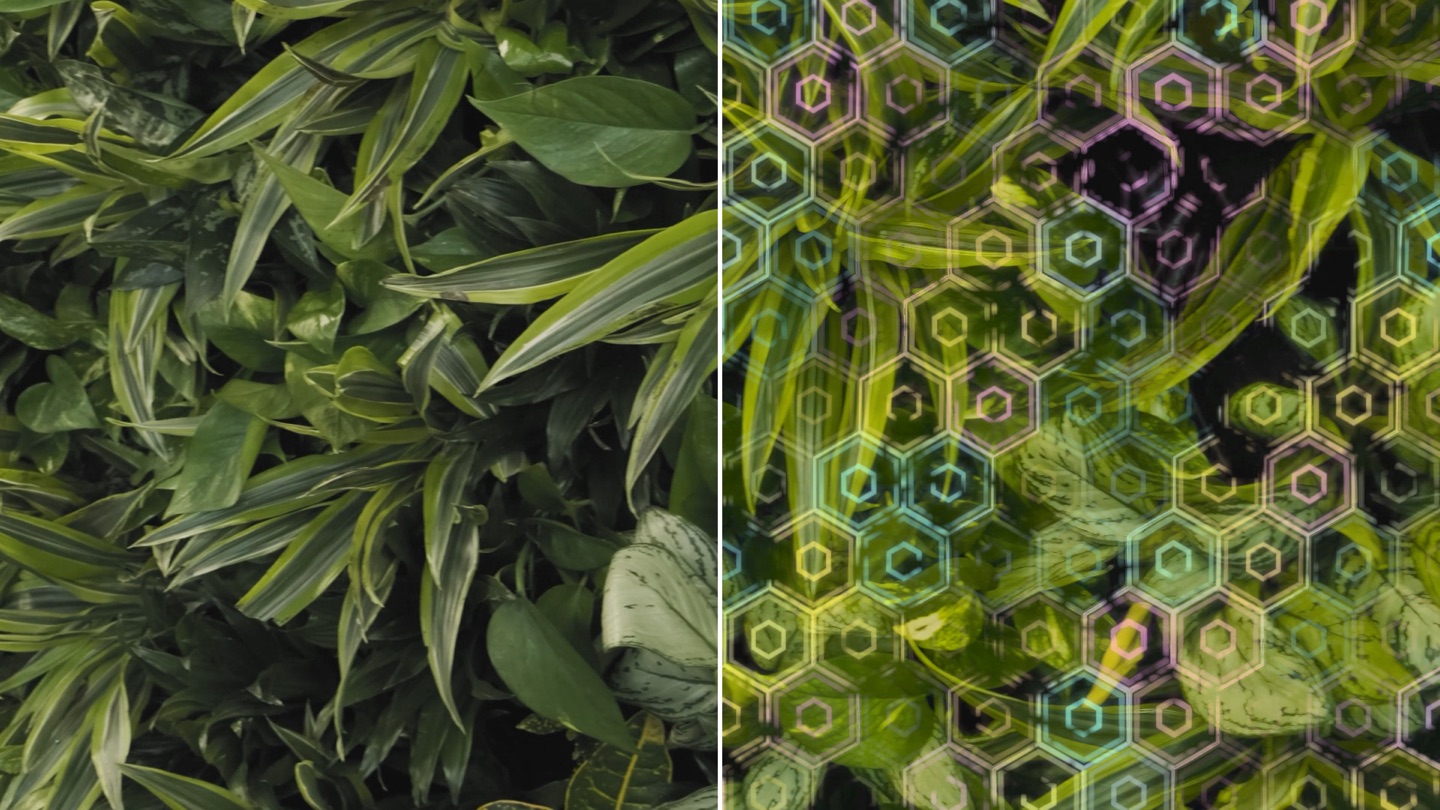
A clip of dense green leaves, split down the middle: the original on the left, the same leaves with a glowing geometric pattern grown over them on the right

The same leaves before (left) and after Add Geometry with the Hive Ripples look (right).

First run

Install, try, and buy Visions

Visions installs through FxFactory, the free plugin manager many Final Cut editors already have. Here is the whole path.

  1. Install it. Get FxFactory if it is not on your Mac yet, quit Final Cut Pro and Motion, then find Visions by Herbistry in the FxFactory app and click its status checkbox to download and enable it. Open your editing app again and it is there.
  2. Add it to a clip. Visions is an effect: in Final Cut Pro, open the Effects browser (Command-5), click the Herbistry category, and drag Visions onto your clip. There is also a Title version for a whole stretch of the timeline, more on that just below. In Motion it is a filter: Library ▸ Filters ▸ Herbistry ▸ Visions.
  3. Try it free. Every look and every control works right away, geometry included, with no time limit. The catch: a tiled Herbistry leaf watermark sits over the picture, and the word TRIAL flashes across the frame for about half a second every 7 seconds. Great for auditioning. Useless for a clean export, which is kind of the point.
  4. Buy it. The Licensing row near the top of the inspector reads Trial, with a Buy button that takes you to Visions in FxFactory. Buy it there and the row flips to Licensed on its own. No key to paste, no relaunch. No FxFactory yet? Buy opens FxFactory's download page instead. Install it, then quit and reopen Final Cut Pro or Motion before you buy: Visions looks for FxFactory when the app starts.

After you buy

The mark comes off by itself. Clips you have open lose it right away, and a clip Final Cut rendered back in the trial cleans itself up the first time you open it after buying, so Final Cut renders it again without the mark. Nothing to touch.

That clean-up is a tiny edit Visions makes for you, so on each clip you used in the trial you may notice one extra Undo step that seems to do nothing: once during the trial, and once after you buy. If a stretch ever still shows the mark, choose File ▸ Delete Generated Library Files, select Delete Render Files, and click OK.

Good to know

Your Macs and your purchase are managed in the FxFactory app. The Help button in the Licensing row opens this manual.

Where it goes

One clip or a whole stretch

Visions ships as two flavors of the same engine. Which one you grab depends on how much of the timeline should trip, and whether you want geometry.

The Effect

Effects ▸ Herbistry
  • Drops onto a single clip, like any other effect.
  • Each copy has its own settings and its own analysis, so it is the natural home for geometry.
  • Two clips can run two different looks.

The Title

Titles ▸ Herbistry
  • Sits on its own layer above the timeline and trips every clip under it, like an adjustment layer.
  • One instance covers a whole montage: stretch it over twenty cuts and they all share the look.
  • Over a gap it stays transparent.

Rule of thumb

One shot, or anything with geometry: the Effect. A run of cuts that should share a trip look: the Title, stretched across them. An analyzed Title tracks every clip under it and starts a new pattern where the picture cuts to another shot; editing, replacing, or relinking a clip under it switches its geometry off until you undo the change or analyze again. In Motion, drop Visions on a layer or a group; where Motion behaves differently, this manual says so.

Start here

The trip: how a look is built

Drop Visions on a clip and it is already running: the fresh insert is a gentle, clearly-on trip with no geometry. Nine rows shape it, and each one answers its own question. Learn which question belongs to which row and the inspector stops being a wall of sliders.

ControlIts one jobThe question it answers
IntensityThe masterHow much Visions, overall?
EnhanceColor depthHow rich do the colors get?
Color ShiftColor travelHow far do the colors wander?
Shift RateThe color clockHow fast do they wander?
DriftSurface motionHow much do surfaces swirl and breathe?
Drift DetailRipple sizeBig swells or fine ripples?
Breath RateThe breathHow fast does it breathe in and out?
TracersTrailsHow strong are the trails behind movement?
Tracer LengthTrail reachHow far back do the trails reach?

The whole chain in one line

Intensity is the volume knob. Enhance and Color Shift are the color, Drift is the surfaces, Tracers are the motion, and the helpers under each one set the pace and size. Set the four big ones first (Enhance, Color Shift, Drift, Tracers), then use Shift Rate, Drift Detail, Breath Rate, and Tracer Length to make it feel right.

The geometry

Add Geometry: analyze once, then it sticks

Before the geometry can stick to a surface it has to know where the surfaces are and how they move. So Visions studies the clip once and saves what it learned inside the effect. It is one click.

  1. Finish the edit around it first. Trim, retime, stabilize, and stack your other effects the way you will deliver it, then analyze. Changing the clip's timing, or anything that reshapes the picture, after the analysis usually means analyzing again. The full list is in When the geometry switches off.
  2. Click Analyze Clip in the Add Geometry row. The button counts up while it works (Analyzing… 37%), then reads Saving tracking… for a moment while it packs the analysis into the effect. In Final Cut Pro the analysis also shows in the Background Tasks window (Window ▸ Background Tasks, or Command-9), where you can cancel it. On the Apple silicon Mac we built Visions on, it works through 1080p and 4K at roughly 25 to 35 frames a second (a 25-second 4K clip in about half a minute), a little slower when the Mac is busy, and 8K at about 10 to 20.
  3. Wait for Tracking ready. The geometry rows appear below the button (Style, its Form, and six sliders), and the Periphery rows appear above it. Nothing geometric draws before this point.
  4. Pick a look. The Geometry: Analyze first group in the Presets menu has nine, one per form. Or set Style and Form yourself.

The analysis lives in the effect

It is saved inside Visions on that clip, so it stays with your project. Click the button again in any state except Analyzing…, Saving tracking…, and Loading tracking… (or Analysis paused while the app still holds the analysis) and it starts a fresh analysis right away, with no "are you sure?" (the one exception: right after you open a project, Analyze Clip on an analyzed clip loads its saved tracking first). That includes Tracking ready, so only click it when you mean it. A fresh analysis also unticks Follow Subject.

What the button is telling you

The Analyze button doubles as the status light. Here is everything it can say. When an analysis fails, Final Cut and Motion stop it straight away without an alert, and the button names the reason.

The button readsWhat it meansWhat to do
Analyze ClipNothing analyzed yet. Right after you open a project, it can also mean a saved analysis has not been read yet.Click it. On an analyzed clip the click loads the saved tracking instead of starting over; click again to re-analyze.
Analyzing… 37%Working through the clip.Wait, or cancel it in Final Cut's Background Tasks window.
Analysis pausedNo new frame has come in for a minute. The analysis was paused in Final Cut's Background Tasks window, or the app stopped sending frames.In Final Cut, resume it in Background Tasks (Command-9); if nothing runs there, click it. In Motion, click it.
Saving tracking…Every frame is done; the analysis is being packed into the effect. A few seconds on a long clip.Wait.
Loading tracking…Reading the analysis saved in the effect, for 1 to 3 seconds: after you open a project, paste the effect or undo, or come back to an analyzed clip you left alone for a while.Give it a moment.
Checking clip…Comparing the clip with the analysis, after a trim or a move. Nothing draws yet.Play across the clip for a second or two.
Tracking readyAll good. The geometry draws.Nothing. Clicking it starts a fresh analysis.
Clip changedThe clip no longer lines up with the analysis: retimed, made longer, or moved to a project with another frame rate.Click it to analyze again.
Different clipThe picture does not match what was analyzed.Click it to analyze this clip.
No match yetWhat it has checked so far does not match. Usually the effect was pasted onto another clip.Click it to analyze this clip.
Clip too longThe clip has more frames than one analysis can hold (see Very long clips). It usually shows as soon as you click.Blade it into parts and analyze each one. Trimming it clears the message.
Frame shape unsupportedThe picture is wider than 20:1 or taller than 1:20, like an LED strip or a panorama band.Visions can't analyze that shape.
Couldn't startFinal Cut Pro or Motion turned down the click.Click it again.
Analysis incompleteThe analysis did not finish: it was cancelled, or it could not be packed into the effect.Click it to try again.
Re-analysis incompleteA new analysis did not finish. The previous one is kept, and it still draws if it matches the clip.Click it to try again.
Analysis unreadableThe saved analysis could not be read.Click it to analyze again.

The layout

The inspector, top to bottom

Everything lives in one inspector, and it keeps itself tidy: the geometry rows stay hidden until the clip has been analyzed, and each Style shows only its own Form. Here is the map, in the order you meet it.

Top of the panel

  • Visions banner the name and version
  • Licensing Trial or Licensed, Buy during the trial, and Help
  • Presets 16 looks, or save your own
  • Intensity the master: how much Visions, at all

The trip

  • Enhance richer colors
  • Color Shift + Shift Rate how far colors wander, and how fast
  • Drift + Drift Detail breathing surfaces, and how fine the ripples are
  • Breath Rate the pace of the breathing
  • Tracers + Tracer Length trails behind motion

Periphery after Analyze

  • Periphery a clean circle the geometry stays out of
  • Periphery Feather how soft its edge is
  • Periphery Center where the circle sits (the crosshair)
  • Follow Subject keep the circle on a moving subject

Add Geometry

  • Analyze Clip the analysis button, and its status

Geometry after Analyze

  • Style Lattice, Fractal Tiling, or Organic Growth
  • Form / Fractal Form / Organic Form one per Style
  • Growth Direction Roots only
  • Geometry Amount, Geometry Scale, Geometry Color how strong, how big, what colors
  • Evolve Rate how fast it grows
  • Surface Gate + Rigidity where it draws, how it bends

At the bottom

  • Mix the app's own blend for the whole effect. Leave it all the way up and use Intensity instead.

"Where did that row go?"

The Periphery rows and all the geometry rows wait until the clip has been analyzed. Undo the analysis and they hide again. After that, only the Form for your Style shows: Form with Lattice, Fractal Form with Fractal Tiling, Organic Form with Organic Growth. Growth Direction only shows with Organic Growth set to Roots.

Every control

The controls, and why you'd reach for each one

Grouped the way the inspector is. For every control: what it does, and the actual reason you would change it.

The master

Intensity

Master · keyframe me

How much Visions, period. It scales every look, the tracers and the geometry included, and it is the final blend with your original clip, so 0 is your untouched footage. If a look is right but there is just too much of it, pull this one slider instead of six others. And because it is keyframeable, this is your fade-in: ramp it from 0 to 100 and the whole trip comes on gradually, like the real thing.

At 0

Your original clip. An exact bypass.

At 200

Every look pushed up to double its own slider (Tracers and Color Shift top out on the way). The deep end.

Color

Enhance

Richer colors

Makes the footage's own colors richer, strongest on the dull ones. Brightness and hue stay where they are and greys stay grey. Only the color itself deepens, so nothing gets painted on. It is the "everything looks more alive" part of a trip. 0 is off.

Color Shift

How far colors wander

Slowly rotates the colors in your shot around the color wheel and brings them back. Saturated colors move the most, greys never move, and each hue swings on its own timing, so differently colored things drift on their own. At 50 a color swings about 33 degrees either way around the color wheel. The swing maxes out at about 54 degrees, which you reach around 83 on the slider.

Shift Rate

Cycles per minute

How fast Color Shift's swing comes and goes, in full cycles per minute. The slider goes to 20; type a number to go up to 30. Low and it creeps up on you. High and the colors visibly wander. At 0 the colors stop wandering and hold one fixed shift.

Surfaces

Drift

Breathing surfaces

Makes textured surfaces swirl and breathe: bark, leaves, brick, fabric, carpet. Flat areas like a clear sky, a plain wall, or anything transparent stay still, which is what keeps it believable. One side effect worth knowing: because the textured side moves and the flat side does not, a silhouette edge against the sky will wobble.

Low

Surfaces shimmer. You're not sure you saw it.

High

The walls are breathing. Everyone saw it.

Drift Detail

Ripple size

How fine Drift's ripples are: it sets how many fit in the height of the frame. Higher means more detail, smaller and finer ripples. Lower means big, slow-looking swells; Breathing Walls runs it at 4. That is the opposite way to Geometry Scale, where higher means bigger, which is why this one is called Detail. The slider goes from 1 to 20; type up to 30.

Breath Rate

Breaths per minute

How fast things breathe in and out, in breaths per minute. It paces Drift's breathing and the geometry's lines and glow, which breathe along with it. At 0 only the rhythmic in-and-out stops; the swirl keeps going. The slider goes to 30; type up to 40.

Motion

Tracers

Trails · off by default

Trails off anything that moves, the classic visual. It is not a plain frame echo: Visions compares several earlier frames and only the parts that actually moved leave a trail, so a walking person drags ghosts behind them while the person stays solid. A moving camera moves everything, though, so on a handheld or panning shot the whole frame trails. That is why the Peak look stops Tracers at 45. Fresh insert is 0, off.

Locked-off shot

Only the movers trail. The money shot.

Moving camera

Everything trails. Fun in doses.

Tracer Length

Trail reach

How far back the trails reach, and how many ghosts make them up. At 0.5 Visions blends three earlier frames spread over the last nine; at 1, four spread over the last twenty. Below about 0.17 the trails switch off altogether. Longer trails ask more of your Mac during playback, see Tips and limits.

Periphery

Periphery, Feather, Center & Follow Subject

After Analyze

A clean circle the geometry stays out of, how soft its edge is, where it sits, and whether it follows someone. These four get their own section next, because they work as a team.

Geometry

Style

The geometry family

Which kind of geometry grows. Lattice is a grid of cells that grow copies of themselves, with a glow traveling across. Fractal Tiling is tiles splitting into smaller copies of themselves, forever zooming deeper in place: each tile is its own little tunnel while the tile itself stays put on the surface. Organic Growth swaps the straight lines for living shapes: cells, branching roots, and growth rings. Style cannot be keyframed: it is one Style per clip, so blade the clip if you want to change it halfway.

Form

Lattice only

The Lattice's pattern: Hex (a honeycomb), Star (a five-pointed star in every cell, each one leaning a little its own way), or Mandala. It holds the form you pick; it never cycles on its own. With Star, when the stars are big on screen (a high Geometry Scale over dark or plain footage), a star's side point can look clipped flat where it meets the next cell. It only shows in those conditions. If it bothers you, pull Geometry Scale down until it stops catching your eye.

Fractal Form

Fractal Tiling only

Triangles, Squares, or Snowflake: hexagons splitting into seven, each level turning a little, so the zoom spirals.

Organic Form

Organic Growth only

Cells: irregular cells with gently flowing walls, each growing rings from its center out to its wall on its own timing. Roots: a branching network that climbs the surface in waves, each branch growing from its parent with a glowing bud at the tip, then fading before the next wave regrows it. Rings: growth rings like wood grain or agate, spreading across the surface. Not keyframeable; blade the clip to switch forms partway.

Growth Direction

Roots only

Which way the roots climb. 0° is up the surface, and it turns counter-clockwise: 90° grows left, 180° grows down. "Up" means up on the surface as it was when the clip was analyzed. Not keyframeable, and saved looks keep it.

Geometry Amount

Strength · keyframe me

How strongly the geometry draws. 0 switches it off and costs nothing, and the analysis stays saved, so turning it back up needs no new analysis. Keyframe it to fade the geometry in and out. Intensity scales it like everything else.

Geometry Scale

0.25× to 4×

The size of the pattern. It grows and shrinks around the Periphery Center crosshair, or more exactly around the spot of scenery that sat under the crosshair where the pattern started. On a locked-off shot that is right under the crosshair; on a moving shot that spot travels with the scenery, so the pattern stays stuck to the surfaces while you scale. Fractal Tiling's tiles are twice the size of a Lattice cell at the same Scale, and a bigger Scale shows more levels inside each tile. Organic Growth's Cells come out about 1.6 times a Lattice cell.

Geometry Color

Footage to palette

At 0 the lines take the surface's own color, brightened. At 100 they go iridescent: every cell, tile, ring, or root segment gets its own color from a cyan, magenta, and gold palette and cycles through it on its own, one full cycle per growth cycle. Where two pieces share a wall, their colors blend across the line.

Evolve Rate

How fast it grows

How fast the geometry lives. For Lattice, how fast cells grow copies and the glow travels; for Fractal Tiling, how fast the zoom runs; for Organic Growth, how fast the cells, roots, and rings grow. At 1, one level or one full cycle takes about 3.3 seconds; the default 0.3 takes about 11. At 0 the growth and the colors hold still, while the lines keep breathing with Breath Rate.

Surface Gate

Where it draws

At 0 the geometry draws everywhere the clip was tracked. Raise it and it keeps to strongly textured surfaces only. At 50, the default, it uses the same idea of "textured" as Drift, so the same surfaces breathe and grow geometry.

Rigidity

How it bends

How closely the pattern follows the surface it sits on. At 0 it bends with every tracked bit of the picture (leaves and branches warp it) while still riding the camera's pan and zoom. At 100 it only pans and zooms with the camera and never rotates or shears. The default 50 lets walls and doorways bend with the shot while foliage stays calm. Following a deliberate camera roll needs a lower setting.

Keep it off the face

Periphery and Follow Subject

Geometry crawling across someone's face is either the best shot in your video or the worst one. Periphery lets you decide: it clears a clean circle the geometry stays out of, and Follow Subject keeps that circle on a person as they move. These rows appear once the clip is analyzed.

A man in front of a brick wall: geometry grows over the bricks while a clean circle keeps his face clear

Geometry on the wall, a clean circle on the face.

Periphery

The clean circle · off by default

The size of the circle. 0 is no circle (the default, and every look starts there). 100 is the biggest circle that fits: as wide as the frame's shorter side. The slider stops at 100, but you can type up to 200: past 100 the circle keeps growing until, at 200, it clears the whole picture. Keyframe it from 0 to 200 to sweep the geometry off, or from 200 down to 0 to grow it in from the edges. It only affects the geometry; the colors and Drift ignore it. With a clip's Spatial Conform set to Fill (or None, on a clip larger than the project), Final Cut shows only part of the clip, but the circle is measured on the whole clip: it can reach past the visible edges, and the picture clears before 200.

Periphery Feather

Edge softness

How softly the circle's edge blends, as a percentage of the frame height, so it looks the same at any resolution. The default 5 is about 54 pixels at 1080. 0 is a hard edge.

Periphery Center

The crosshair

Where the circle sits: drag the crosshair in the viewer (Final Cut) or the canvas (Motion) onto your subject. It starts in the middle of the frame and it can be keyframed. In Final Cut the crosshair only shows while the effect is selected: select the clip, then click the word Visions in the Video inspector so it highlights. On a Title, selecting the Title is enough. Final Cut also hides on-screen controls while it plays, so park the playhead to place it. In Motion, select the Visions filter and choose the Adjust Item tool in the canvas toolbar. Drag the crosshair off the picture and the circle parks on the nearest edge of the clip. With Spatial Conform set to Fill, that edge can be outside the part of the clip you see.

The crosshair is also Geometry Scale's anchor: the pattern is laid around it and grows around it, so moving the crosshair re-lays the pattern too. That is why keyframing the crosshair to chase a subject slides the whole pattern along with it. To move the circle while the pattern stays stuck to the scenery, use Follow Subject.

Follow Subject, step by step

  1. Wait for Tracking ready in the Add Geometry row, and set Periphery above 0 so there is a circle to see.
  2. Park the playhead on a frame where your subject is clear.
  3. Put the crosshair on them: their face, their chest, the product.
  4. Tick Follow Subject. Boom. The circle follows that spot forwards and backwards through the whole clip, using the tracking the analysis already saved, so it is instant. One Undo takes the tick back.

While it follows

The crosshair stays where you placed it and the circle moves away from it, which is expected. Keyframes on Periphery Center are ignored while Follow Subject is ticked. To move the follow: untick, park on a frame where your subject is clear, put the crosshair on them, and tick again there. Untick to go back to the crosshair and its keyframes. A fresh analysis unticks Follow Subject, so tick it again afterwards.

It follows the surface under the crosshair, so it works best on something with its own texture: a face, a person, a vehicle, a product. Something small or fast over a busy, still background can slip off; try ticking again on a clearer frame. If the tracking loses the subject, or they leave the picture, the circle stays where it last had them for the rest of the clip, even if they come back or the shot cuts. While it still has them, a cut carries it over on the same spot, and it follows whatever is under that spot in the new shot.

Ticked it and nothing follows?

Periphery is at 0, so there is no circle to see. Or the button did not read Tracking ready yet, the playhead was on a part of the clip that has not been analyzed, or the crosshair was off the picture. Untick, check the button, park the playhead on the clip, and tick again. If the button reads Clip changed, analyze again first: nothing follows until the analysis covers the whole clip.

The connective tissue

How the controls play together

Most of dialing in Visions is not finding the right row, it is knowing which other row your change just touched.

Intensity sits on top of everything

The big one

Every look, the tracers, and the geometry run through Intensity. A look built at Intensity 100 and then pulled to 60 keeps its balance, just less of it. Keyframe Intensity for fades instead of keyframing six sliders.

Breath Rate paces two things

Drift + geometry

The breathing of the surfaces and the breathing of the geometry's lines and glow share Breath Rate. Slow it down for a meditative look and both calm down together.

Drift bends the geometry

On purpose

Drift swirls the surfaces, and the geometry sits on those surfaces, so its lines bend along. That is the look. To judge how well the geometry sticks to a surface, set Drift to 0 for a moment, then bring it back.

Surface Gate and Drift agree

Same texture test

At Surface Gate 50 the geometry uses the same idea of a "textured surface" as Drift. Raise Surface Gate and the geometry pulls back to the busiest surfaces only, while Drift carries on everywhere it did before.

The crosshair anchors the pattern

Center ↔ Scale

Periphery Center is both where the clean circle sits and the point Geometry Scale grows around. It still anchors the pattern with Periphery at 0. Move the crosshair and the pattern re-lays around the new spot. With Follow Subject ticked, the followed spot takes over both jobs.

Evolve Rate also moves the colors

Geometry Color 100

With Geometry Color up, each piece cycles its palette once per growth cycle, so Evolve Rate sets the color pace too. At Evolve Rate 0 the growth and its colors both hold still.

A cut doesn't restart the trip

Blade freely

The color swing, the breathing, and the geometry's growth carry straight on across a blade or a trim, so you can cut a clip up without the trip jumping back to the start of its cycle on every piece.

One click, full look

The 16 looks

The Presets menu near the top of the inspector carries 16 built-in looks in two groups, plus Default, the settings Visions starts with and your reset button. Applying a look sets every look control at once, and one Undo takes it back. It never touches Periphery Center, Follow Subject, or the saved analysis, and it leaves any control that has keyframes alone, so an Intensity fade keeps its fade. When that happens the Presets row adds · kept after the look's name (, keyframes kept when the name is short enough to leave room), and hovering over it names those controls.

Trip

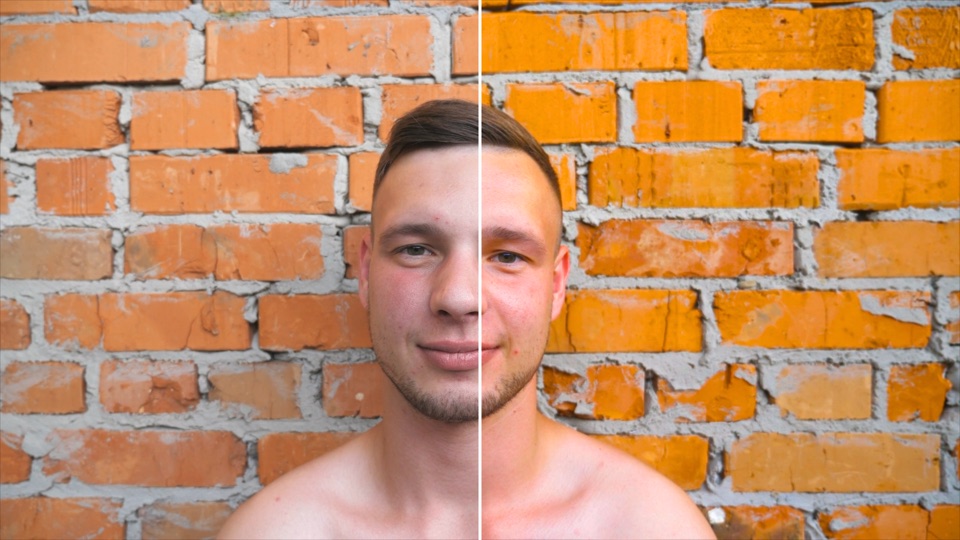
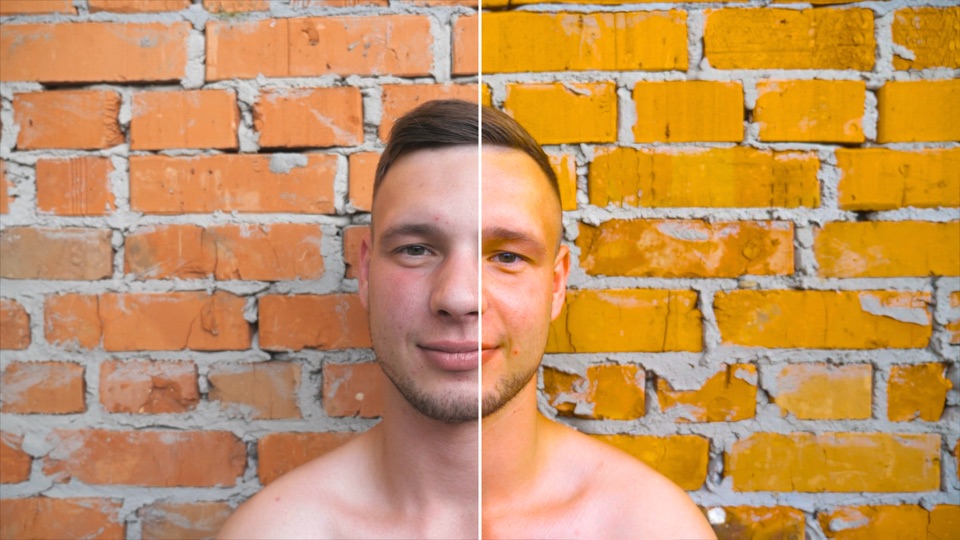
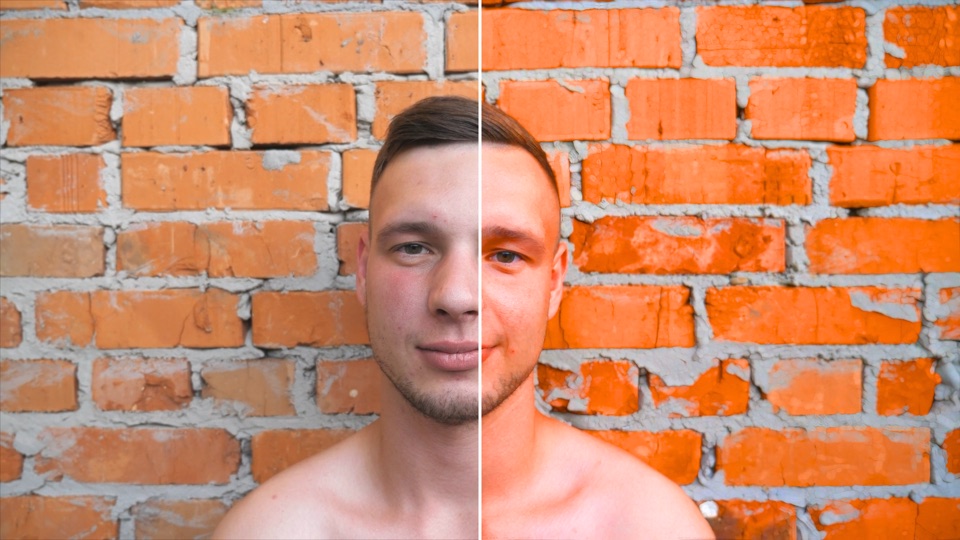
Seven looks with no geometry, so they work on any clip: four in rising strength, then three that each push one part of the trip. Left half original, right half Visions.

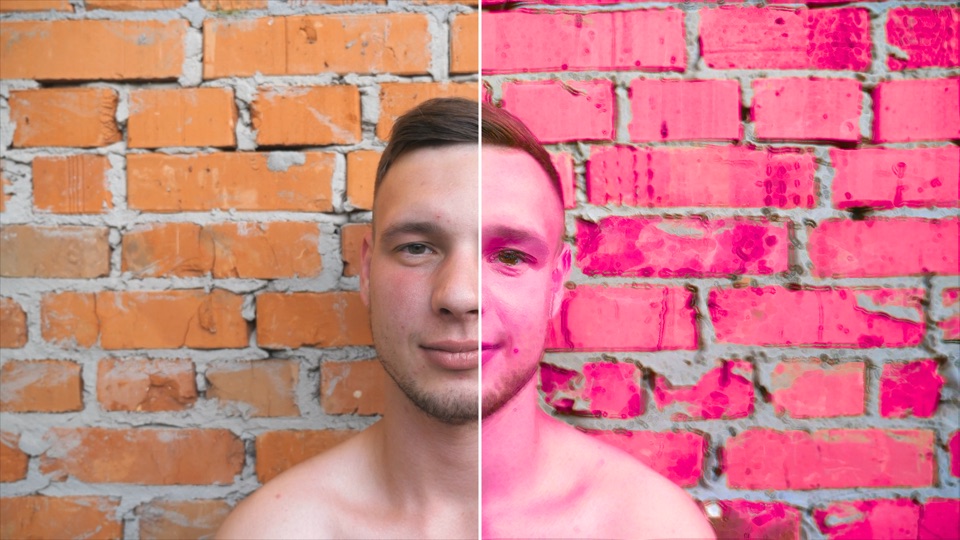
Microdose look on a man in front of a brick wall, original on the left

Microdose

Enhance 30 · Color Shift 15 · Drift 20 · no tracers

Barely there. The colors are a touch too alive and the walls are thinking about moving. Put it on a whole video and nobody can say why it feels different.

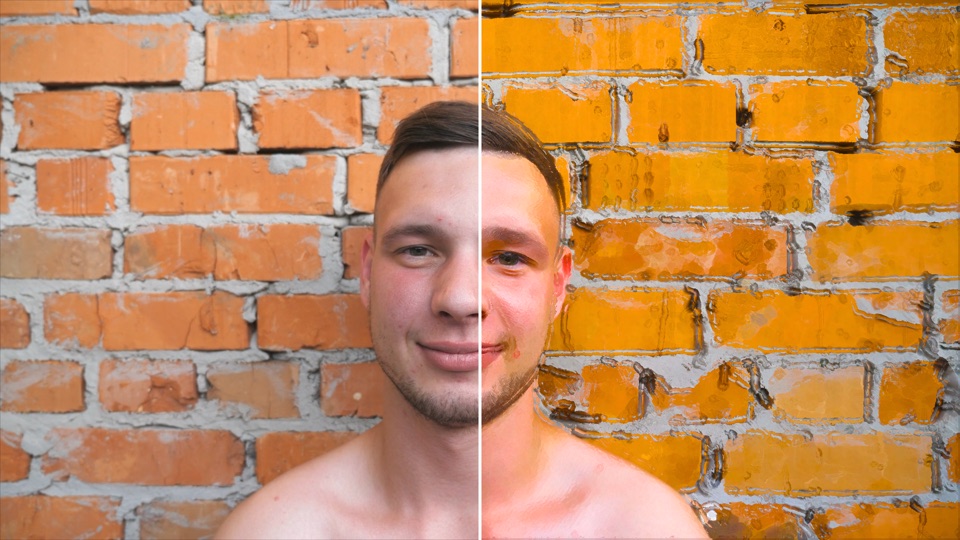
Threshold look on a man in front of a brick wall, original on the left

Threshold

Enhance 45 · Color Shift 35 · Drift 40 · Tracers 15

Clearly on, still grounded. Colors wander, surfaces breathe, and faint trails start following movement.

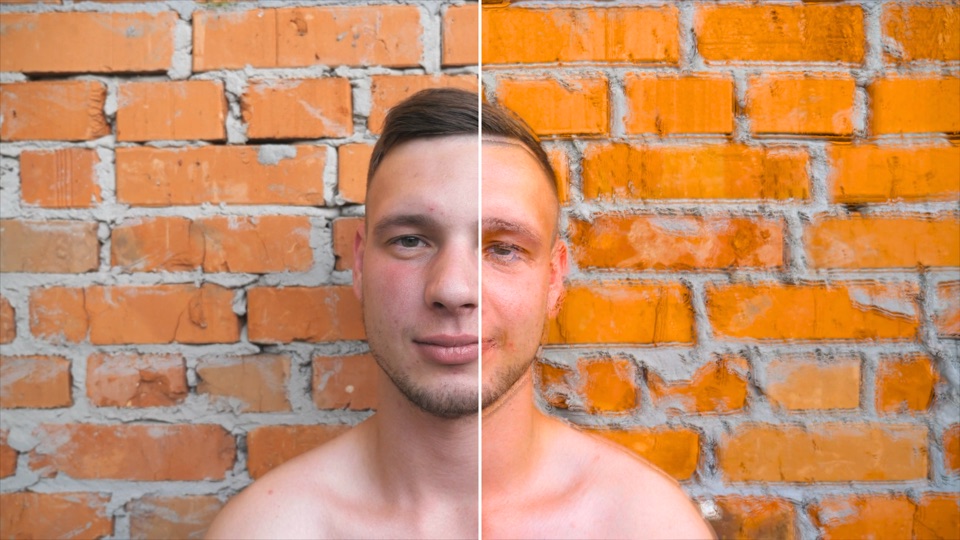
Plateau look on a man in front of a brick wall, original on the left

Plateau

Enhance 65 · Color Shift 60 · Drift 60 · Tracers 35

The full ride. Rich, wandering color, everything breathing, trails behind anything that moves.

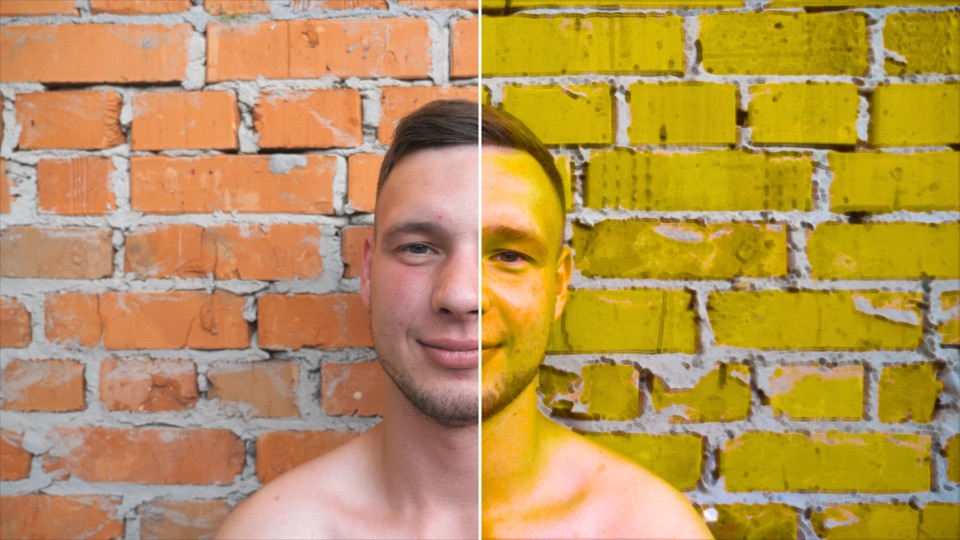
Peak look on a man in front of a brick wall, original on the left

Peak

Enhance 85 · Color Shift 80 · Drift 80 · Tracers 45

Everything up. Tracers stop at 45 on purpose: any higher and a moving camera ghosts the whole frame.

Breathing Walls look on a man in front of a brick wall, original on the left

Breathing Walls

Enhance 40 · Color Shift 20 · Drift 90, Detail 4 · no tracers

Surfaces swell and swirl in big, slow ripples. The "were those bricks always moving?" look.

Tracers look on a man in front of a brick wall, original on the left

Tracers

Enhance 40 · Color Shift 25 · Drift 20 · Tracers 80, Length 0.9

Long trails off anything moving, the rest held calm. A moving camera moves everything, so lock the shot off or lean into it.

Color Bleed look on a man in front of a brick wall, original on the left

Color Bleed

Enhance 75 · Color Shift 85, Rate 8 · Drift 25 · no tracers

All about the color: it deepens and wanders fast, with just a little surface motion underneath.

Geometry: Analyze first

One look per form, each over a light trip (Enhance 45, Color Shift 30, Drift 30). Nothing geometric draws until the Add Geometry button reads Tracking ready. On a clip that has not been analyzed you just get the light trip.

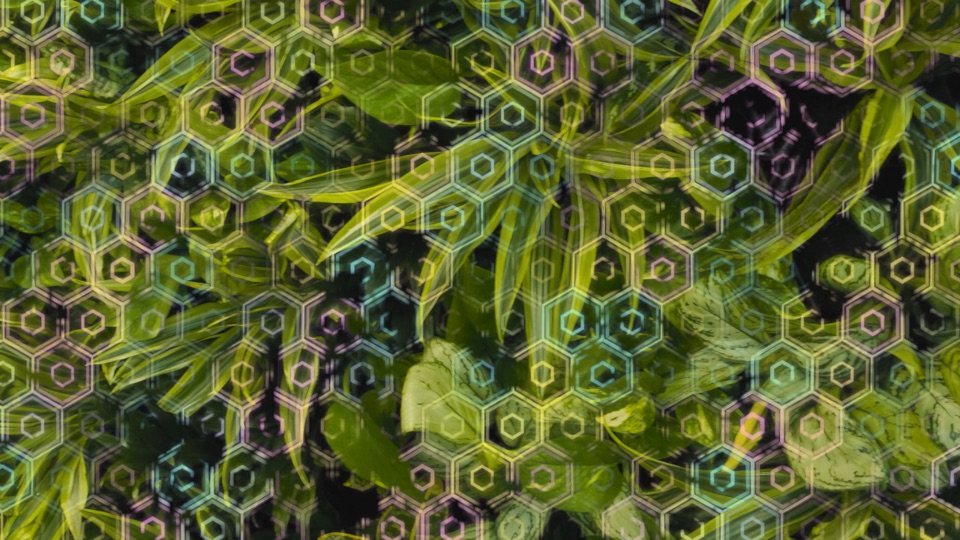
Hive Ripples: a glowing honeycomb grown over dense leaves

Hive Ripples

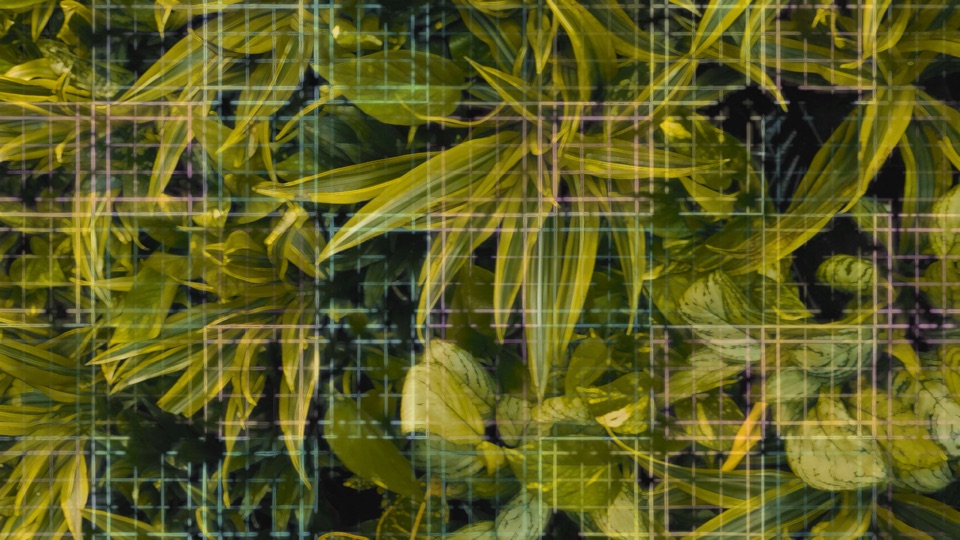
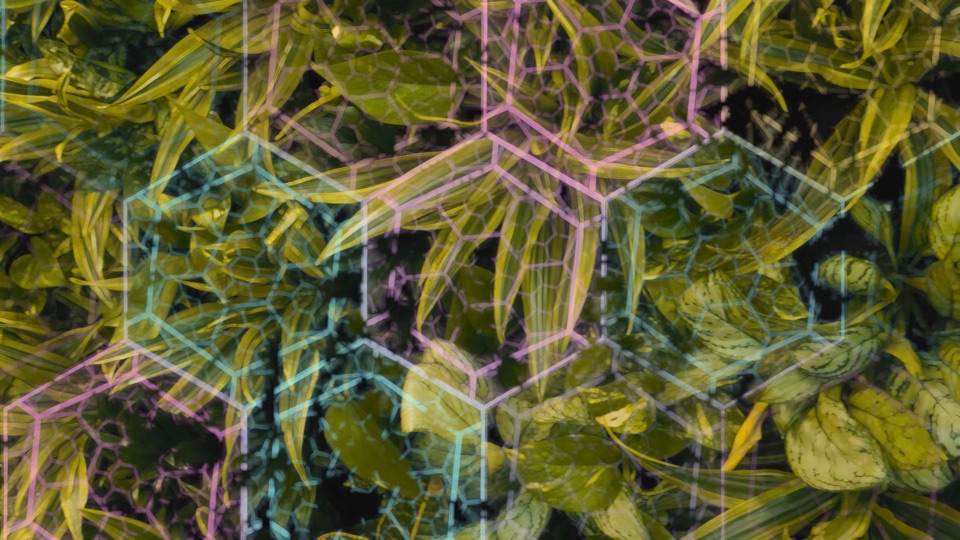
Lattice · Hex · Amount 80 · Scale 1 · Color 60 · Evolve 0.3

A honeycomb that grows copies of itself in slow ripples across every textured surface.

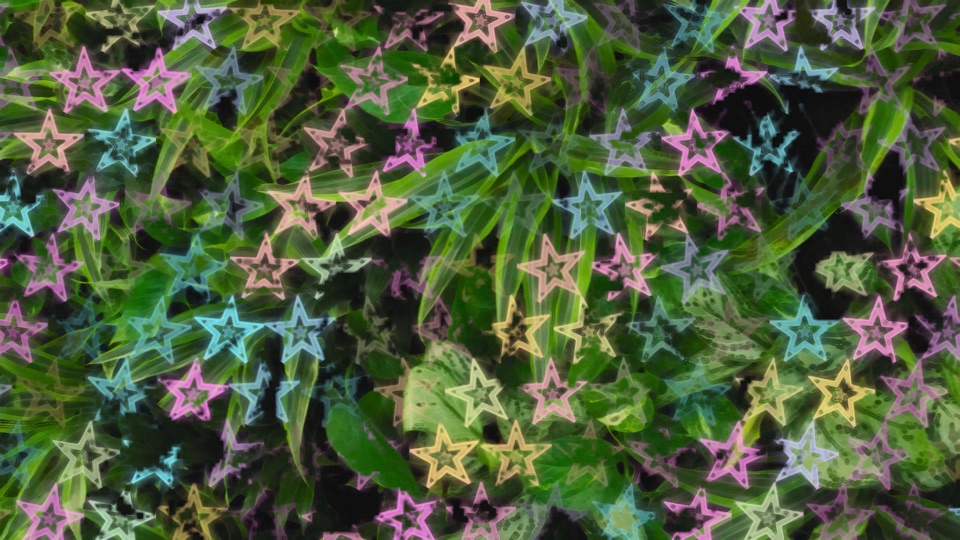
Super Star: five-pointed stars in iridescent colors over dense leaves

Super Star

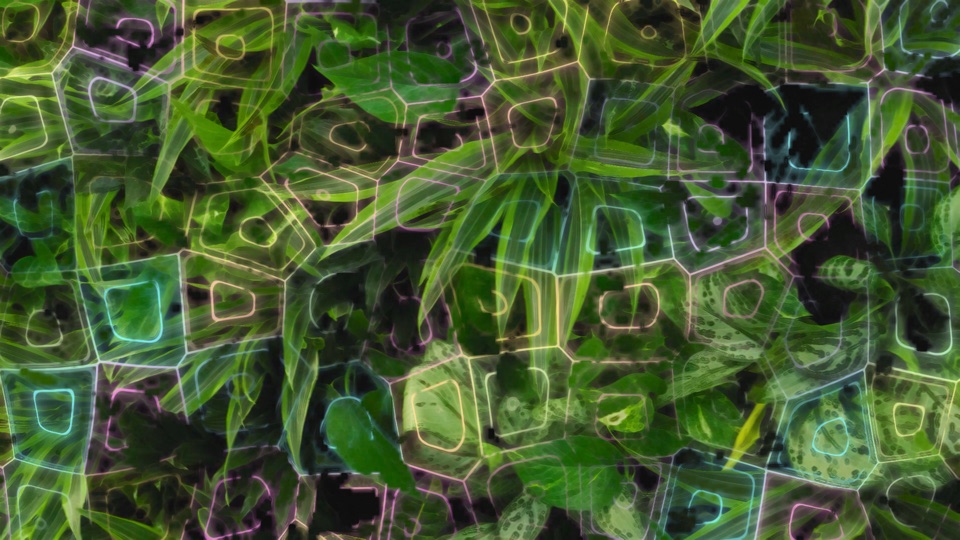
Lattice · Star · Amount 65 · Scale 1.2 · Color 100 · Evolve 0.5

A five-pointed star in every cell, each one leaning its own way and cycling through the full iridescent palette.

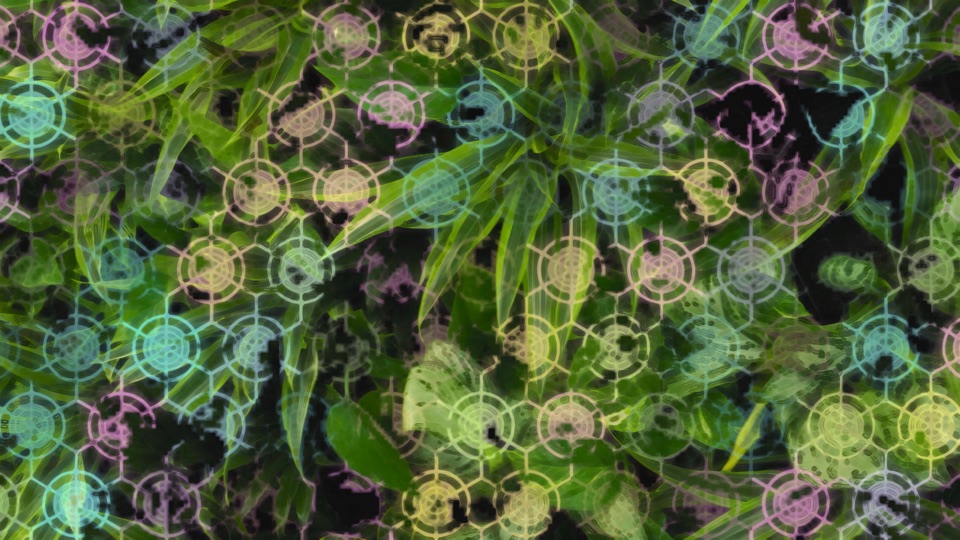
Mandala: mandala patterns grown over dense leaves

Mandala

Lattice · Mandala · Amount 65 · Scale 1.5 · Color 70 · Evolve 0.3

Bigger, slower cells, each one a mandala. The calm one.

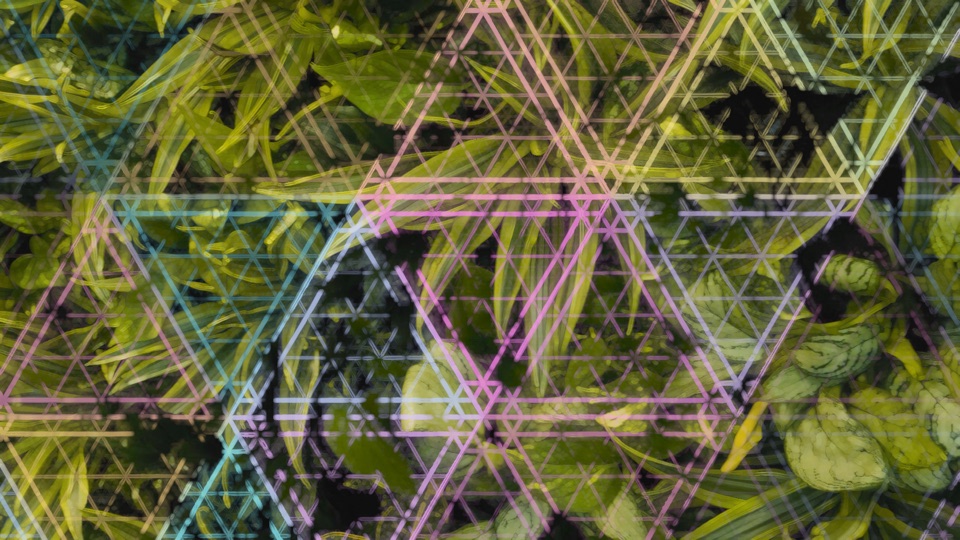
Third Eye: triangles splitting into smaller triangles over dense leaves

Third Eye

Fractal Tiling · Triangles · Amount 65 · Scale 1.5 · Color 100 · Evolve 0.6

Triangles splitting into triangles, zooming deeper forever, in full iridescent color.

Mirrored Doorway: square tiles opening into smaller squares over dense leaves

Mirrored Doorway

Fractal Tiling · Squares · Amount 70 · Scale 1 · Color 45 · Evolve 0.4

Square tiles that keep opening into smaller squares, like standing between two mirrors.

Snow Galaxy: spiralling hexagon snowflake tiles over dense leaves

Snow Galaxy

Fractal Tiling · Snowflake · Amount 65 · Scale 2 · Color 80 · Evolve 0.4

Hexagons splitting into seven and turning as they go, so the whole zoom spirals.

Cell Division: irregular living cells with glowing walls over dense leaves

Cell Division

Organic Growth · Cells · Amount 80 · Scale 1 · Color 85 · Evolve 0.5

Irregular living cells with gently flowing walls, each growing rings from its center on its own timing.

Mycelium: a branching root network with glowing tips over dense leaves

Mycelium

Organic Growth · Roots · Amount 90 · Scale 1.2 · Color 50 · Evolve 0.6

A branching network climbing the surface in waves, glowing buds at the tips, fading and regrowing.

Tree Rings: growth rings like wood grain over dense leaves

Tree Rings

Organic Growth · Rings · Amount 80 · Scale 1 · Color 75 · Evolve 0.3

Growth rings like wood grain or agate, spreading slowly across the surface.

Trip looks switch the geometry off

Every look sets every look control, so a Trip look on an analyzed clip sets Geometry Amount to 0 and puts every other geometry control, and Periphery, back to Default. Keyframed sliders are the exception: a keyframed Geometry Amount keeps its keyframes, so the geometry stays on, but as the default Lattice (Hex, 1×). Turning Geometry Amount back up after a Trip look brings back that same default Lattice, not the geometry you had: re-apply your Geometry look, or your own saved look, for that. No new analysis is needed either way.

Editing after Analyze

When the geometry switches off

The analysis belongs to the clip exactly as it was when you analyzed it. Visions keeps checking the picture against it, and when the two stop matching it switches the geometry off rather than draw it in the wrong place. Here is what each edit does.

Trims

Usually fine

Trimming a clip shorter keeps the tracking. Trimming the head in Final Cut, or moving a layer in Motion, keeps it too: the button reads Checking clip… until you play over the clip for a moment, then Tracking ready.

Making the clip longer

More than 1 second

The tracking covers the whole clip or nothing. Extend a clip by more than about a second at either end (in Motion, by more than one frame) and the button reads Clip changed (or No match yet on new frames added at the start), and the geometry draws nowhere until you analyze again. In Final Cut, a second or less is fine: the geometry holds the nearest analyzed frame and fades out over the new frames. That way it can never quietly stop halfway through an export.

Transitions added afterwards

Final Cut fades

A dissolve added after analyzing makes the clip reach into frames that were never analyzed. In Final Cut, up to a second of that is fine: the geometry holds the nearest analyzed frame and fades out with the dissolve. Transitions longer than 2 seconds read Clip changed; analyze again with the transition in place. Motion does not fade. If the last analyzed frame is black or nearly blank, extending past it reads Clip changed too.

Retiming

Analyze again

Slowing a clip down reads Clip changed, or Different clip on moving footage; a small slow-down on a still shot may not be caught. Speeding it up keeps it inside the analyzed range, so Visions may not catch it, especially on a shot with a still background. After any speed change, analyze again. Undo the retime instead and the tracking comes back once you move the playhead.

Another frame rate

Analyze again

The analysis belongs to the frame rate of the project it was made in. Copy the clip into a project at another rate (24p into 30p, 29.97 into 59.94) and it reads Clip changed. Changing a clip's Rate Conform frame sampling afterwards changes the in-between pictures but not the rate, so Visions does not reliably notice: analyze again after changing it.

Pasting Visions onto another clip

Analyze the new one

The pasted analysis belongs to the old clip. A clip with different content usually reads No match yet or Different clip. Careful with another take of the same setup: the shots look alike, so the check can pass at first and catch the difference later, even mid-export. After pasting, always analyze again.

Changing the picture underneath

Titles · compounds · relinks

Visions re-checks the picture against the analysis every few seconds. Edit a clip under an analyzed Visions Title, edit inside an analyzed compound clip, or relink to other media, and the geometry switches off a few seconds into playback with Different clip. Undo the change (or relink back) and it returns once the playhead passes that spot again. If you keep the change, analyze again.

Exporting XML

Analyze again

File ▸ Export XML carries your Visions settings and the look's name, but not the analysis. After File ▸ Import ▸ XML, the button reads Analyze Clip: analyze the clip again, then check where the Periphery Center crosshair sits.

Motion: the filter's own bar

Motion only

In Motion, Visions analyzes its own filter bar, which is all the effect renders. With the bar starting where the layer starts, making the layer longer than the bar changes nothing, and trimming the end of the bar keeps the tracking. Extend the bar's end more than a frame past what was analyzed and it reads Clip changed. If the bar starts later than the layer, Visions analyzes the whole layer instead, so a long layer can read Clip too long even though the bar is short: trim the layer, or move the filter so it starts where the layer starts.

Very long clips

Split them

One analysis holds a set number of frames, and the picture's shape decides how many. It counts frames, not minutes, at the project's frame rate, so a 60 fps project gets there in half the time of a 30 fps one. Resolution doesn't matter: 1080p, 4K, and 8K of the same shape share a limit. The shape is the clip's own, so a 16:9 clip in a square project still gets the 16:9 limit. Shapes in between get a limit in between (16:10 holds 24,300). Over the limit, the button reads Clip too long as soon as the analysis starts: blade the clip into parts and analyze each one.

Frame shapeMost framesAt 24 / 30 / 60 fps
16:9 or wider, or vertical 9:1627,00018 min 45 s / 15 min / 7 min 30 s
4:320,25014 min 3 s / 11 min 15 s / 5 min 37 s
Square 1:115,18710 min 32 s / 8 min 26 s / 4 min 13 s

Anything that reshapes the picture

Set it up first

Visions analyzes the picture it is handed. Stabilization, rolling-shutter fixes, and the other effects stacked with Visions can all change that picture, so set them up the way you will deliver before you analyze, and analyze again after changing them. Same goes for other plugins still in their trial: their watermark gets analyzed too, so license them first.

The short rule

If you changed the clip and the button reads anything other than Tracking ready or Checking clip…, click it (Checking clip… only needs you to play over the clip). A fresh analysis is the fix for nearly everything on this page.

Good to know

Tips and limits

A few things that save you a headache, and what the tracking can't do.

Tracers and smooth playback

Playback only

Tracers blend earlier frames, so with Tracers on, Final Cut decodes two to four extra frames for every frame it shows. In a high frame rate project, live playback can stutter even though Visions' own work is small. Render the shot and it plays back smoothly: select the clip in the timeline and choose Modify ▸ Render Selection (Control-R). Final Cut also renders on its own a moment after you stop working, unless background rendering is turned off in its settings. Change a Visions setting and that part needs rendering again. For a long tracer edit, make optimized or proxy media instead (File ▸ Transcode Media) and set the viewer's View menu to Proxy Preferred, or pick Better Performance in that same menu. Switch back to original media before you share. Your export is not affected: every frame renders in full.

Judge Drift at 100%

Viewer size

Drift is subtle in a scaled-down viewer. Set the viewer's zoom menu to 100% to judge it, and turn the other looks down to see it on its own.

Textureless areas can't be tracked

Sky · flat walls

The tracking works by following detail, so a blown-out sky or a plain painted wall gives it nothing to hold. The geometry keeps to textured surfaces by design, and Visions follows the camera through the textured parts of the picture too, so a big empty sky doesn't drag the geometry on the ground around with it. When the camera pans and new scenery enters the frame, the new part can wobble for a moment before it settles.

HDR, color spaces, and odd shapes

Edge cases

Visions tracks HDR footage in HDR projects in Final Cut and Motion. Detail brighter than normal white isn't used for tracking, so geometry in the brightest highlights follows the surface around them. The colors are tuned for standard (Rec. 709) projects; in a wide-gamut or HDR project they can read more saturated. 360° video is not supported: you would see seams at the wrap, and Periphery is measured on the flat frame. Very wide strips past 20:1 (LED walls, panorama bands) can't be analyzed, and shapes close to that may not track well.

About flashing: a photosensitivity note

Visions shifts colors, swirls and pulses surfaces, and grows glowing patterns, and the trial adds a periodic TRIAL flash. Images like these can trigger seizures in people with photosensitive epilepsy, including people with no history of it. If your audience may include photosensitive viewers, keep Shift Rate, Breath Rate, and Evolve Rate gentle and give them a warning up front. The full notice is in the license agreement.

Make it yours

Saving your own looks

Built something you love? Save it and reuse it anywhere.

  1. Dial in the look until it is right.
  2. Open the Presets menu and choose Save Current Settings….
  3. Give it a name (up to 100 characters) and click OK. It shows up under My Presets, below the built-in looks, in A to Z order, and pointing at it there shows Rename… and Delete. Saving under a name you already used asks before it replaces that preset.

What a saved look keeps

Every look control, from Intensity down to Rigidity, including Style, the forms, and Growth Direction. It does not keep Periphery Center, Follow Subject, or the analysis, so one saved look works on any clip. Your saved looks live on your Mac, not inside one project, so they follow you into every project. Renaming a saved look never changes your clips: the Presets row just shows the new name. If something goes wrong saving, renaming, or deleting, you get an alert and nothing changes. The one rare exception is a rename that cannot put its files back either (a full disk, say): its alert tells you to check My Presets for a leftover copy.

Cheat sheet

Quick reference

The sliders at a glance, from one end to the other.

ControlLow endHigh end
Intensity0: your original clip200: every look up to double its slider
Enhance0: colors as shot100: deepest color
Color Shift0: colors stay put83 and up: the widest swing (about 54°)
Shift Rate0: a fixed shift, no wandering20 (type up to 30): fast wandering
Drift0: surfaces still100: the walls are breathing
Drift Detail1: huge, slow swells20 (type up to 30): fine ripples
Breath Rate0: no rhythmic breathing, swirl keeps going30 (type up to 40): fast breaths
Tracers0: no trails100: heavy trails
Tracer Lengthbelow 0.17: off1: four ghosts, reaching 20 frames back
Periphery0: no clean circle100: biggest circle that fits (type 200: whole frame)
Periphery Feather0: hard edge25: very soft edge
Geometry Amount0: geometry off100: strongest lines
Geometry Scale0.25×: tiny cells4×: huge cells, more fractal levels
Geometry Color0: the surface's own color100: iridescent palette
Evolve Rate0: growth holds still2: fast growth
Surface Gate0: draws everywhere tracked100: busiest surfaces only
Rigidity0: bends with every surface100: pans and zooms with the camera only

Before you install

System requirements

Visions is a Mac video plugin. Here is what you need.

Operating system
macOS 13.5 or later
Ventura 13.5 and up.
Works in
Final Cut Pro 10.8.1 / Motion 5.8 or later
As an effect, plus a Title for whole-timeline use.
Mac type
Apple silicon Mac
Runs natively on M1, M2, M3, and later.
Installing
Via FxFactory
Free trial with watermark; buy it in FxFactory.

Get help

Stuck on something?

Trouble installing, a look not landing, or geometry that won't stick? Reach out and we'll sort it.

Contact support →