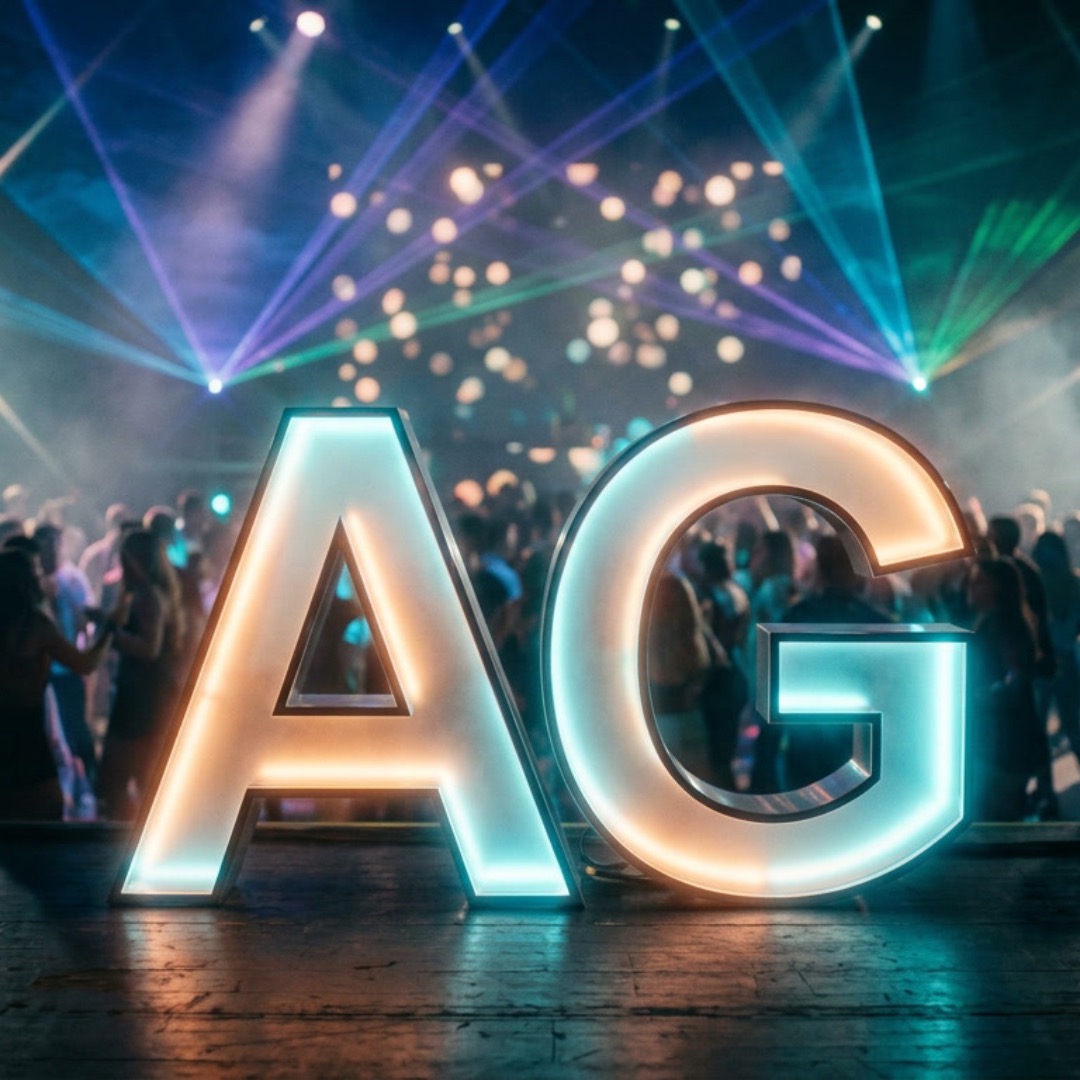
Optical film glowby Herbistry · for Final Cut Pro & Motion
Afterglow
Light, the way real glass and film treat it. Afterglow finds the bright parts of your shot and only glows those, so a neon sign blazes and a face stays clean. Dial it gentle for a tasteful polish, or push it into a full dreamy haze.
The short version
What Afterglow does
Drop Afterglow on a clip and it does the optical stuff real glass and film stocks do to bright light. Four passes, stacked: a soft bloom around your highlights, a warm halation bleed hugging them, a hazy diffusion veil that lifts the blacks and kills the digital edge, and a highlight roll-off that lets blown whites go creamy instead of harsh.
The trick that makes it read real: every glow is highlight-aware. Afterglow isolates the bright parts of your actual footage first, then glows only those. A streetlight blooms, the wall beside it does not. That is the whole difference between this and the pre-rendered "glow" overlays that just blur the entire frame. It is a focused optical-glow effect, not a full film-emulation suite, and it runs in real time on Apple Silicon.
First run
Install, run, and unlock Afterglow
From download to a clean export. Here is the whole path.
Get FxFactory. Afterglow installs through FxFactory, the free plugin manager for Final Cut Pro and Motion. Grab it at fxfactory.com if you do not have it already.
Install Afterglow. Find Afterglow by Herbistry inside FxFactory and install it from there. If Final Cut or Motion was open, restart it so it picks up the new effect.
Find it in Final Cut. Afterglow is a clip effect. It lives in the Effects browser ▸ Herbistry ▸ Afterglow. Drag it onto a clip like any other effect. In Motion it is in the Filters library under Herbistry.
Try it free. Every control works right away, no time limit. The catch is a Herbistry leaf watermark tinting the frame, so the trial is perfect for auditioning the looks but not for a clean export.
Buy and unlock. Purchases happen right inside the FxFactory app. Buy Afterglow there and the watermark disappears. FxFactory remembers the license, so it is a one-time thing.
Good to know
Afterglow does all its work on your Mac, on the graphics card, frame by frame. Your video never leaves your computer.
Simple front, pro back
One effect, two depths
Afterglow opens with four friendly sliders and a preset menu. Everything deeper is one checkbox away, and hidden until you ask for it.
The simple front
Always visible
A Presets menu, then four sliders: Amount, Warmth, Bloom Softness, and Diffusion.
These four are macros: each one drives several of the real controls underneath at once.
Pick a look, push Amount, done. A finished glow in about ten seconds.
Best for: most shots, most of the time.
The pro panel
Tick "Show Advanced"
Turn on Show Advanced and the full rig appears: glow source, bloom, halation, star, diffusion, desaturation.
Every one of those is the real value the simple sliders were steering for you.
Override anything by hand. The front sliders keep working alongside it.
Best for: colorists, fine-tuning, and the cyberpunk hue-pop.
Nothing is faked or hidden
The four front sliders are not a dumbed-down preview. They move the exact same pro parameters you see when you tick Show Advanced. Start simple, open the hood whenever you want more, and the two never fight each other.
The layout
The inspector, top to bottom
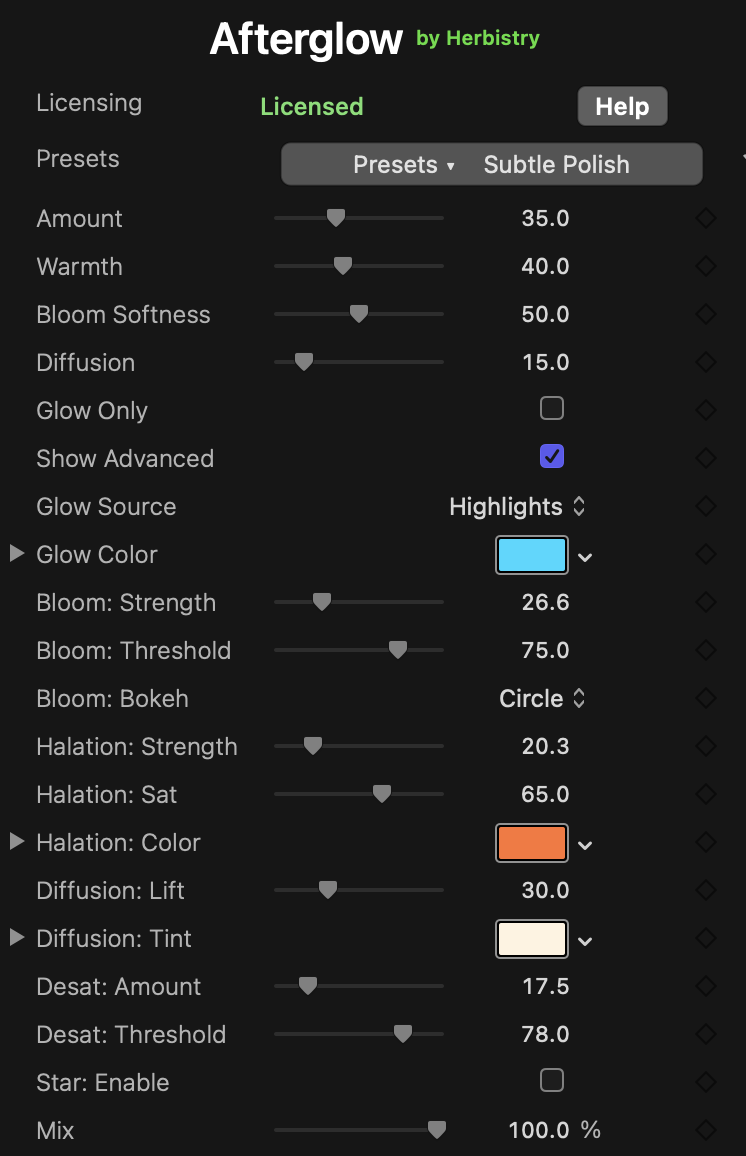
Everything lives in one inspector. The simple front is always up top. The rest only appears once Show Advanced is on, grouped by pass so each control reads as "which effect, which knob."
The Afterglow inspector with Show Advanced on, so the full per-pass rig is visible. Most days you only touch the four dials up top.
Simple front
Presets load a full look, or save your own
Amount the master dial: how much glow overall
Warmth clean white bloom to warm film halation
Bloom Softness how wide the glow spreads
Diffusion the hazy veil over the whole frame
Preview & advanced
Glow Only see just the added light, on black
Show Advanced reveals everything below
Glow Source & Bloom
Glow Source Highlights, Color, or Both
Glow Color the target hue for Color / Both
Bloom: Strength, Threshold, Bokeh the soft halo and its shape
Points, Length, Angle, Strength the cross-screen spokes off bright points
The four that matter
The simple front, one by one
Four sliders, all 0 to 100. Most looks are just these four. Amount is the one you reach for first.
The master
Amount
Master
How much glow overall. It scales the bloom, the halation, and the highlight roll-off together, so one slider takes the whole effect from a whisper to a full bloom. This is the dial most people touch and the one to ease back when a look is too much.
At 0
No added glow. The picture comes through clean.
At 100
Full bloom and halation. Highlights bloom hard.
Diffusion is separate, so even at Amount 0 the veil can still be working if you want haze without bloom. Default is 35.
The character
Warmth
Default 40
Sets the flavor of the glow, from a clean neutral lens bloom to a warm film halation, and warms the halation tint as it climbs.
At 0
Neutral white bloom. A clean glass-lens glow.
At 100
Warm orange halation. Full film-stock bleed.
Bloom Softness
Default 50
How far the glow spreads out from a highlight, from a tight rim to a wide, airy haze. It also softens the diffusion bleed, since they share the same blur.
At 0
A tight halo hugging the highlight.
At 100
Wide, dreamy spread across the frame.
Diffusion
Default 15
The black-mist veil, the soft filter that lifts the blacks and pulls the hard digital edge off everything. It runs on its own, separate from Amount, so you can have haze with no bloom or bloom with no haze.
At 0
Crisp. True blacks, sharp edges.
At 100
Hazy and lifted, the Pro-Mist look.
Two switches up front
Glow Only shows you just the added light on a black frame, so even a subtle glow is easy to see while you tune. Flip it back off when you are done. Show Advanced reveals the pro panel below. Both start off.
Under the hood
The pro panel
Tick Show Advanced and these appear, grouped by pass and named "group: knob" so they stay easy to find. Reach for them when a front slider cannot get you where you want, or when you want the neon hue-pop.
Glow Source
Glow Source & Glow Color
Highlights · Color · Both
What the glow keys off. Highlights glows by brightness, the normal film behavior. Color glows only the parts near a hue you pick in Glow Color, so just the neon-cyan sign lights up and nothing else. Both does brightness and hue together. This is the cyberpunk hue-pop, and it is the most fun control in the panel.
Glow Color defaults to a neon cyan. It only does anything in Color or Both mode.
Bloom
Bloom: Strength & Threshold
Threshold 75
Strength is how bright the soft halo gets. Threshold is the gate: how bright a pixel has to be before it blooms at all. Lower the threshold and more of the frame starts to glow; raise it and only the very brightest points do.
Bloom: Bokeh
Circle · Hexagon · Octagon
The shape of the out-of-focus glow, like a real lens aperture. Circle is the clean default. Hexagon and Octagon give the bloom defined blade edges, the vintage-glass look on defocused highlights.
Halation
Halation: Strength & Sat
Sat 65
The warm bleed that hugs your highlights, the thing film does and digital does not. Strength is how much. Sat is how vivid the bleed is, from a faint warmth to a saturated orange glow.
Halation: Color
Warm red-orange
The tint of the bleed. It defaults to a warm red-orange, the classic film halation color, but it is a full color well so you can take it anywhere. Warmth on the simple front nudges this for you; here you set it outright.
Diffusion & Highlight Roll-off
Diffusion: Lift & Tint
Lift 30
Lift raises the floor of the blacks, the milky lifted-shadow part of the Pro-Mist look. Tint colors the veil, a soft warm white by default. The simple Diffusion slider sets how much veil there is; these two shape it.
Desat: Amount & Threshold
Threshold 78
The creamy highlight roll-off. Amount pulls the color out of your brightest pixels so a blown highlight reads as soft film white instead of a clipped digital color. Threshold sets how bright a pixel must be before it starts to desaturate.
Star / Cross-Screen
Star: Enable · Points · Length · Angle · Strength
Off by default
A real cross-screen filter. Turn on Star: Enable and bright points grow angular streaks, the spikes you get shooting lights through a star filter. Points sets the spoke count (4, 6, or 8). Length is how far the streaks reach, Angle rotates the whole star, and Strength is how bright the spikes are.
It stays off until you switch it on, and the render skips the whole pass when it is off, so it costs nothing until you want it. Best on point lights: streetlamps, candles, neon, a sun glint.
Advanced
Building looks by hand
Any single slider is simple. Here is how to think about them together so you are steering, not guessing.
The mental model
Four questions, in order. How much? That is Amount. Clean or filmic? That is Warmth. How wide? That is Bloom Softness. How much haze? That is Diffusion. Set those four first. Only open Show Advanced when one of them cannot get you the last ten percent.
Tasteful polish
Amount 35 · Warmth 40 · Diffusion 15
The default, and a reason it is the default. A glow you feel more than you see. Lifts skin and highlights without anyone clocking that an effect is on.
Warm film
Amount 85 · Warmth 85 · Halation up
Push Warmth and the bloom turns into a warm orange halation hugging every highlight. The film-stock bleed, the classic golden-hour look on any footage.
Dreamy haze
Bloom Softness 80 · Diffusion 45 · Bokeh: Hexagon
Open the glow wide and lift the veil. Soft, lifted, glowy, the music-video daydream. Switch Bokeh to Hexagon for that vintage-glass shimmer on defocused lights.
Black mist
Diffusion 80 · Diffusion: Lift up · Amount low
Veil-forward, glow-quiet. Diffusion high with the Lift up gives you milky blacks and a soft filmic bloom, the diffusion-filter look without much bloom on top.
Neon hue-pop
Glow Source: Both · pick the neon color · Star on
The showpiece. Set Glow Source to Both, drop the Glow Color on the neon you want, and only that color blazes. Flick the Star on for spikes off the point lights and you have the cyberpunk frame.
Tune with Glow Only
Glow Only on · set Threshold & Softness · Glow Only off
Not a look, a workflow. Flip Glow Only on to see just the light you are adding on black, dial Threshold and Softness until the glow sits on the right things, then flip it back off.
One click, full look
The looks
Six built-in looks ship with Afterglow. A look is a snapshot of every control at once, so picking one sets the whole stack. Choose from the Presets menu at the top of the inspector, then tweak anything from there. A fresh insert starts on Subtle Polish.
Clean Bloom
Lens
Amount 70 · Warmth 15 · Soft 40 · Diff 0
A neutral, bright lens bloom with almost no warmth and no veil. The pure highlight glow, clean as glass.
Dreamy Haze
Soft
Amount 80 · Warmth 45 · Soft 80 · Diff 45
Wide soft bloom, lifted veil, hexagon bokeh, and a gentle 6-point star. The daydream look for music videos and soft-focus moments.
Warm Halation
Film
Amount 85 · Warmth 85 · Soft 55 · Diff 20
Heavy warm red-orange bleed hugging every highlight. Full film-stock character, the golden bleed on bright edges.
Black Mist
Diffusion
Amount 45 · Warmth 35 · Soft 60 · Diff 80
Veil-forward and cool. A heavy Pro-Mist haze with milky lifted blacks and a slightly cool tint. The diffusion-filter classic.
Neon Night
Showcase
Amount 95 · Warmth 30 · Soft 45 · Diff 10
The showpiece. Glow Source set to Both for a neon-cyan hue-pop, plus a 4-point star spiking the point lights. Cyberpunk in one click.
Subtle Polish
Default
Amount 35 · Warmth 40 · Soft 50 · Diff 15
The fresh-insert default. A gentle all-around glow that flatters the picture without announcing itself. When in doubt, start here.
Make it yours
Saving your own looks
Built a glow you love? Save it and reuse it anywhere.
Dial in the look until it is right.
Open the Presets menu at the top of the inspector and choose Save.
Give it a name. It now sits in the menu right alongside the six built-in looks, and you can rename or delete it from there too.
Where your looks live
Each look you save is a small file on your Mac under Library ▸ Application Support ▸ Herbistry ▸ Afterglow ▸ Presets in your home folder. (That Library folder is hidden by default: in Finder, hold Option and open the Go menu to see it.) Because they live there and not inside one project, your looks follow you across every project, and you can hand a look file to a teammate so they get the exact same glow.
Two kinds of "preset"
Afterglow looks vs. Final Cut presets
This trips people up, so it is worth being clear. There are two separate places a preset can live, and they save different things.
Afterglow looks
Inside the plugin · the Presets menu
Saves the glow: every Afterglow slider, source, and switch in one snapshot.
Travels with you. Available in every project, on any clip, and the file can be shared.
Saves only Afterglow's own controls, nothing else on the clip.
Best for: a glow you want to reuse everywhere.
Final Cut Pro presets
Inside Final Cut · Save Effects Preset
Saves the whole effect on the clip, including keyframes and any other effects stacked on it.
Lives in Final Cut's library. Only available inside Final Cut Pro.
Re-apply it to other clips to repeat the exact treatment.
Best for: remembering the whole clip treatment, not just Afterglow.
Rule of thumb
Use an Afterglow look when you want to reuse a glow anywhere. Use a Final Cut preset when you want Final Cut to remember an entire clip setup so you can stamp it onto the next shot.
Cheat sheet
Quick reference
Every control at a glance, from one end to the other. The four up top are the simple front; the rest appear under Show Advanced.
Control
Low end
High end
Amount
0: clean image, no glow
100: full bloom and halation
Warmth
0: neutral white bloom
100: warm orange halation
Bloom Softness
0: tight halo
100: wide dreamy spread
Diffusion
0: crisp, true blacks
100: hazy, lifted blacks
Glow Source
Highlights: glow by brightness
Color / Both: glow by hue
Bloom: Threshold
0: most of the frame blooms
100: only the brightest points
Bloom: Bokeh
Circle: clean round glow
Hexagon / Octagon: bladed edges
Halation: Strength
0: no warm bleed
100: heavy red-orange bleed
Halation: Sat
0: faint warmth
100: vivid saturated bleed
Diffusion: Lift
0: true blacks
100: milky lifted blacks
Desat: Amount
0: highlights keep their color
100: creamy white highlights
Star: Length
0: short spikes
100: long reaching streaks
Star: Points
4: classic cross
8: full sunburst
Before you install
System requirements
Afterglow is a Mac video effect. Here is what you need.
Operating system
macOS 13.5 or later
Ventura and up.
Works in
Final Cut Pro 10.8.1 / Motion 5.8 or later
As a clip effect, under the Herbistry category.
Mac type
Apple Silicon Mac
M1, M2, M3, and later. Apple Silicon only.
Installing
Through FxFactory
Install, buy, and unlock in the free FxFactory app.
Get help
Stuck on something?
Trouble installing, unlocking, or dialing in a look? Reach out and we'll sort it.