Download PDF
Audio Effector icon
Music-reactive video effectsby Herbistry · for Final Cut Pro & Motion

Audio Effector

Music in, motion out. Audio Effector listens to your song and moves the picture with it: pulse, strobe, spin, shake, tear, and glow, all locked to the music. Build the look yourself or start from a preset.

The short version

What Audio Effector does

Drop Audio Effector onto a clip, hand it the song, and the video starts moving in time with the music. Nine effects are on board: a size pulse, a strobe, a spinner, two shakers, a zoom punch, an RGB split, a glitch, and a bloom. Run one, or stack all nine for full chaos. Every effect has a single strength slider, so building a look is fast.

One honest note up front: Final Cut does not let an effect listen to your timeline audio, so Audio Effector reads the song from a file you choose instead. Point it at the same song you cut into the timeline and the beats land in the same places. This manual covers the whole workflow, every control, and the presets.

First run

Install, run, and unlock Audio Effector

From download to a clean export. Here is the whole path.

  1. Get FxFactory. Audio Effector installs through FxFactory, the free plugin manager for Final Cut Pro and Motion. Grab it at fxfactory.com if you do not have it already.
  2. Install Audio Effector. Find Audio Effector by Herbistry inside FxFactory and install it from there. If Final Cut or Motion was open, restart it so it picks up the new effect.
  3. Find it in Final Cut. It shows up in two places: the Effects browser ▸ Herbistry ▸ Audio Effector for single clips, and the Titles browser as an adjustment layer that covers a whole section. More on the difference below.
  4. Try it free. Every control and preset works right away, no time limit. The catch is a Herbistry leaf watermark tinting the frame, so the trial is perfect for auditioning but not for a clean export.
  5. Buy and unlock. Purchases happen right inside the FxFactory app. Buy Audio Effector there and the watermark disappears. FxFactory remembers the license, so it is a one-time thing.

Good to know

Audio Effector does all its work on your Mac. Your video and your song never leave your computer.

Clip or section

Two ways to apply it

Audio Effector comes as a regular clip effect and as an adjustment-layer Title. Same controls in both, different reach.

The clip effect

Effects browser · Herbistry · Audio Effector
  • Drop it onto one clip, like any other effect.
  • Each clip gets its own settings and its own song.
  • Best for: a single shot, an intro, or different looks per clip.

The adjustment-layer Title

Titles browser · Audio Effector
  • Place it on a layer above your clips and stretch it across the whole section.
  • Every cut underneath reacts to one song with one set of settings.
  • Comes with a Mix slider to blend the whole treatment in or out.
  • Best for: montages, music videos, and anything cut to a song.

Rule of thumb

One clip? Use the effect. A run of clips cut to music? Either stretch the Title over all of them, or use the clip effect with Sync To set to Timeline, so the beat grid stays continuous across every cut instead of restarting on each one. More on Sync To below.

The layout

The inspector, top to bottom

Everything lives in one inspector. From the top down it reads in five blocks, and the controls that do not apply to your setup hide themselves, so it stays tidy.

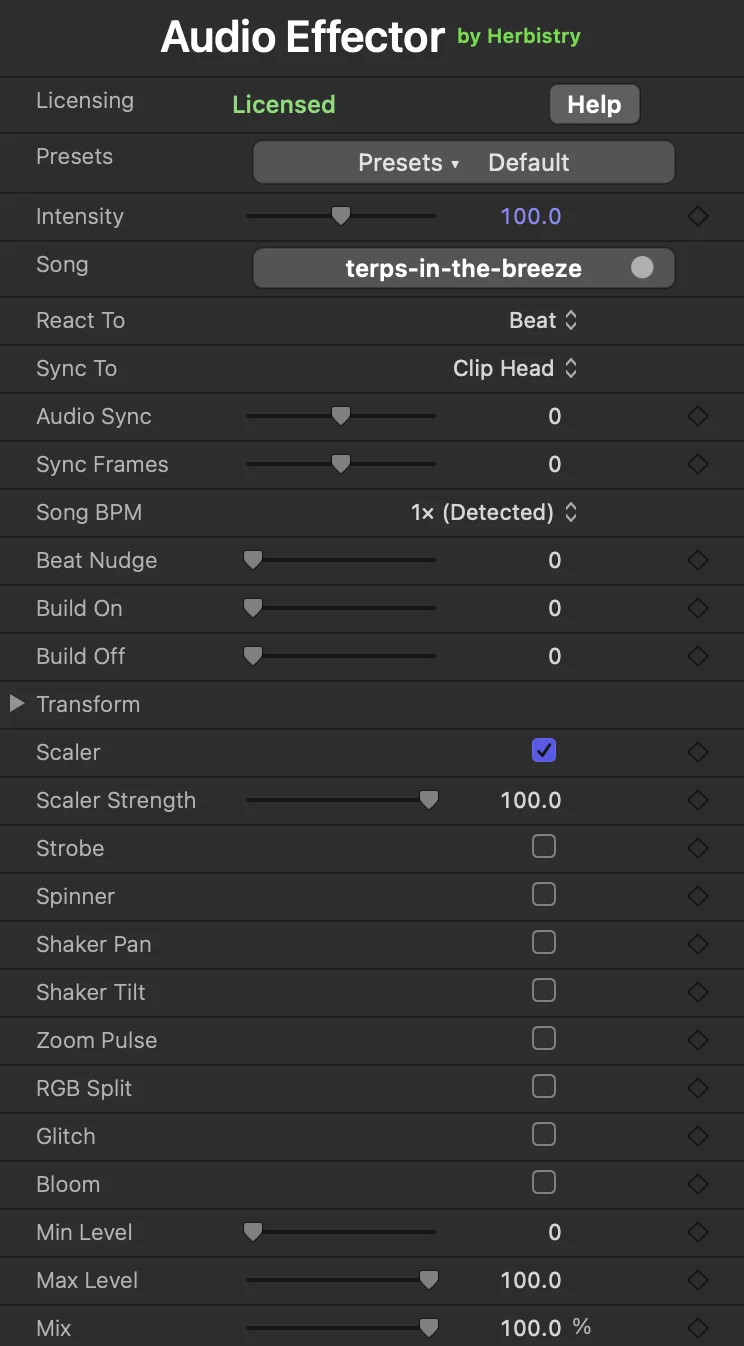
The Audio Effector inspector with a song loaded: the 'Audio Effector by Herbistry' header, then the Licensing row (Licensed, with a Help button), Presets, Intensity, Song, React To, Sync To, Audio Sync, Sync Frames, Song BPM, Beat Nudge, Build On, Build Off, the collapsed Transform group, Scaler and Scaler Strength, Strobe, Spinner, Shaker Pan, Shaker Tilt, Zoom Pulse, RGB Split, Glitch, Bloom, Min Level, Max Level, and Mix.

The Audio Effector inspector with a song loaded, so every control is showing. Controls that don't apply to your current setup hide themselves, so it stays tidy.

Presets & drive

  • Presets load a full look, or save your own
  • Intensity the master dial: how hard everything reacts

Audio

  • Song pick the audio file the effects follow
  • React To Beat, Loudness, Bass, Mid, or Treble
  • Sync To Clip Head, or Timeline to cut freely and stay locked
  • Audio Sync where the song sits, in seconds
  • Sync Frames frame-accurate fine-tuning on top
  • Min & Max Level sensitivity window; at the very bottom, appears once a song is loaded

Timing

  • BPM manual tempo, only shown when no song is loaded
  • Song BPM tempo multiplier, appears once a song is loaded
  • Beat Nudge shift beat-timed hits within the beat
  • Build On & Off ramp the reaction in at the start, out at the end

Transform

  • Scale, Position X & Y, Rotation your base framing
  • Edge & BG Color what fills the frame edge when the picture moves

Effects

  • Nine on/off switches Scaler, Strobe, Spinner, Shaker Pan, Shaker Tilt, Zoom Pulse, RGB Split, Glitch, Bloom
  • Each reveals a Strength slider plus extras like Hard Flash and the direction dials

The audio engine

Feed it your song

This is the part that makes Audio Effector tick. Give it the song once, and every effect knows where the beat is.

  1. Click "Choose Song…" and pick the audio file. MP3, WAV, M4A, AAC, anything your Mac can play. Use the same file you put in your timeline.
  2. Let it analyze. The button reads "Analyzing…" for a moment while Audio Effector reads the song once: overall loudness, bass, mids, treble, and the tempo. It happens on your Mac and it only happens once per song. If the tempo lands at half or double what you expect, the Song BPM multiplier puts it right in one click.
  3. Pick what to react to. The React To menu decides which part of the music drives the picture. Beat is the default and the cleanest.
  4. Cut it to the beat. Set Sync To to Timeline and you can slice the clip into as many pieces as you want, each with its own look, and they all stay locked to the song with no re-syncing. If your song does not start at the very front of the timeline, set Audio Sync to how far in it starts, then Sync Frames for the last frame or two. Keeping it to a single uncut clip? Leave Sync To on Clip Head and the song just starts with the clip.

React To, decoded

Beat

  • A steady pulse on the detected tempothe cleanest, most rhythmic option, and the default

Loudness

  • Follows the overall energy of the mixorganic, swells with the song

Bass

  • The low end: kick and subthe thump. Made for drops

Mid

  • Vocals, synths, guitarsthe body of the mix

Treble

  • Hi-hats, cymbals, sparklefast, glittery movement

Min & Max Level

Once a song is loaded, these two sliders set the window the song's level is measured against. Audio at or below Min Level does nothing; audio at or above Max Level hits full reaction. Raise Min to ignore quiet ambience so only real hits move the picture. Lower Max to make a mellow track slam anyway.

No song? It still grooves

With no song loaded, Audio Effector runs on a built-in metronome. Set BPM to match your track (30 to 300) and the beat-driven effects march along to it. Beat Nudge slides those hits within the beat, in both modes: 0 is right on the beat, 0.5 is the off-beat, 1 is a full beat late. Handy when the strobe should hit the snare instead of the kick.

Mixing frame rates

Final Cut handles most frame rate mismatches invisibly. The exception is 23.98 or 24 fps footage in a 25 fps project, or 25 fps footage in a 23.98 or 24 fps project: there it changes the clip’s speed by about 4%. Audio Effector stays locked to your timeline, so the animation keeps matching what you hear and the picture is the thing that shifts. There is no setting to turn this off. Either match your project’s frame rate to your footage, or convert the clip before you bring it in.

Every control, low to high

The controls, one by one

Each effect is a switch plus a strength slider. 100% is the designed amount, 0% is off, and most run up to 400% for when tasteful is not the assignment.

Drive

Intensity

Master

The master dial. It scales how hard every enabled effect reacts, all at once. If the look is right but it is all too much or too little, this is the one slider to reach for.

At 0%

Nothing moves. The picture sits perfectly still.

At 200%

Everything reacts at double strength.

100% is the designed amount. Ease this back before you start rebalancing individual effects.

Sync & timing

Sync To

Cut-friendly sync

How Audio Effector follows your song. Clip Head, the default, starts the song at the front of the clip. Timeline locks the song to the project timeline instead, so you can cut the clip into as many pieces as you like and every piece stays in sync, with nothing to re-line-up. Reach for Timeline the moment you start slicing to the beat.

Clip Head

Song starts at the clip's front. Simple, but each cut restarts it.

Timeline

Song follows the timeline. Cut freely, it stays locked.

Audio Sync

Line it up

Where your song sits, so the picture matches what you hear. In Timeline mode, set it to how far into the timeline your song starts; in Clip Head mode, it slides the song against the clip. Put the seconds here, and if you need it frame-perfect, add the frames in Sync Frames just below. It reaches up to two hours in for feature-length projects.

Sync Frames

Fine-tune

Frame-accurate fine-tuning on top of Audio Sync, for when the reaction is off by just a frame or two. It counts in your project's frame rate, so a few frames means a few frames whether you are at 24, 30, or 60. Audio Sync gets you the seconds, Sync Frames gets the last little bit.

Song BPM

Tempo multiplier

Load a song and Audio Effector finds its tempo for you and locks the beat to it. This popup rides on top of that, and it is the tempo row you get once a song is loaded. 1× (Detected) is the default and runs at the tempo it found. If the detection came in at half or double the real speed, which happens on plenty of electronic and hip-hop tracks, pick or ½ to put it back on the money. Or drop to or ¼ just because a slower pulse feels better on the shot. Every option is an exact slice of the song's own tempo, so the movement stays locked and never drifts off, however long the clip runs. Pick a different song and it snaps back to 1× on its own.

Build On

Ramp in

Eases the reaction in from nothing at the clip's start. Set the seconds and everything that reacts climbs from still to full over that stretch, so a look arrives instead of snapping on. Your base framing stays put; it is the movement that builds. Leave it at 0 and the effects hit full strength from the first frame.

Build Off

Ramp out

The other end: eases the reaction back out to nothing before the clip ends, for a clean landing out of the movement. Set the seconds and everything that reacts settles from full to still over the final stretch. If Build On and Build Off together do not fit the clip, they share it fairly. Leave it at 0 and the effects run full strength right to the last frame.

Transform

Scale · Position · Rotation

Base framing

Your starting frame, before any effect moves it. Scale zooms in or out, Position X and Y slide the picture, Rotation tilts it.

Pro move: set Scale to about 110%. The shakers and spinner then have room to move without ever showing the edge of the frame.

Edge & BG Color

Edge fill

When the picture shakes, spins, or zooms out, something has to fill the gap it leaves. Edge picks what: Repeat Edge, Mirror, Tile, Background Color, or Transparent.

Mirror is the invisible one. Background Color uses the BG Color well below it. Transparent lets layers underneath show through.

The nine effects

Scaler

On by default

Pulses the size of the picture with the music. The classic bounce, and the only effect that ships switched on.

Strength 0%

No pulse. The frame holds still.

Strength 400%

Huge pumping zoom on every hit.

Strobe

+ Hard Flash

Flashes the brightness in time with the music. The Hard Flash switch picks the flavor: on for a hard on/off snap, off for a smooth swell and dim.

Strength 0%

No flashing.

Strength 400%

Full blackout-to-blast light show.

A strobe is a strobe: if photosensitive viewers will watch this, keep it gentle or use the soft flash.

Spinner

Reversible

Rocks the rotation of the frame with the music, from a gentle sway to a full twirl.

Strength -400%

Maximum spin, counter-clockwise lean.

Strength +400%

Maximum spin, clockwise lean.

Negative numbers flip the direction at the same strength. 0 is off.

Shaker Pan

Reversible

Knocks the picture side to side on the hits. Your handheld-camera energy, minus the chiropractor.

Strength -400%

Full shake, leading left.

Strength +400%

Full shake, leading right.

Shaker Tilt

Reversible

Same knock, up and down. Stack it with Shaker Pan for a real rattle.

Strength -400%

Full shake, leading down.

Strength +400%

Full shake, leading up.

Zoom Pulse

The punch

A fast zoom punch into the frame on each hit, like the camera takes the kick drum to the chest.

Strength 0%

No punch.

Strength 400%

Slammed on every hit.

Pairs beautifully with React To: Bass. This is the subwoofer-cam effect.

RGB Split

+ Rotation dial

Tears the color channels apart on the hits, that chromatic music-video fringe. The RGB Split Rotation dial sets which direction the channels pull, with 0° being horizontal.

Strength 0%

Channels stay glued together.

Strength 400%

Full psychedelic separation.

Glitch

+ Direction dial

Slices the frame into digital tears that jump on the hits, like the signal is fighting for its life. The Glitch Direction dial sets which way the slices travel.

Strength 0%

Clean signal.

Strength 400%

Total datamosh meltdown.

Bloom

The glow

Blooms a soft glow out of the bright parts of the image on each hit. Dreamy at low strength, radioactive at high.

Strength 0%

No glow.

Strength 400%

The whole frame breathes light.

Pairs beautifully with React To: Treble for shimmer, or Loudness for swells.

Advanced

Working the effects together

Any single effect is simple. The fun starts when you stack them. Here are starting points; trust your eyes from there.

The mental model

Three questions, in order. What drives it? That is React To. What moves? Those are the effect switches and their strengths. How hard overall? That is Intensity. When a look feels like too much, ease Intensity back before touching anything else. You can almost always rescue it with one slider.

The reliable bounce

Scaler 100 · React To: Beat

The default for a reason. A clean size pulse on the beat reads instantly and works on literally any footage. When in doubt, start here.

Subwoofer cam

Zoom Pulse 100 + a pinch of both Shakers · React To: Bass

The camera takes the hit. Zoom Pulse does the punch, the shakers at 15 or so add the rattle. Every kick drum lands in the viewer's chest.

Club wall

Scaler 60 + Strobe 120, Hard Flash off · React To: Beat

A pumping frame with a soft strobe over it. The soft flash keeps it watchable for a whole section instead of exhausting after ten seconds.

Music-video tear

RGB Split + Glitch · React To: Treble · directions 90° apart

Let the hi-hats rip the frame. Set RGB Split Rotation and Glitch Direction 90 degrees apart so the two tears pull different ways instead of stacking into one smear.

Give it room

Transform: Scale 110 + Edge: Mirror · under any shake or spin

Not a look of its own: this one is the setup you add under the movers. A small pre-zoom plus mirrored edges means Shaker Pan, Shaker Tilt, and Spinner can hit as hard as they like without ever exposing the frame edge. Set it once, then stack any recipe on top.

Slow burn

Scaler 35 + Bloom 50 · React To: Loudness

For verses, ambient sections, and anything that should breathe instead of bounce. The picture swells gently with the energy of the mix.

One click, full look

Presets

A preset is a snapshot of every control at once: which effects are on, their strengths, what they react to. Pick one from the Presets menu at the top of the inspector, then tweak anything you like. One thing presets never touch is your song. The look changes, the music stays.

Start here

Default preset: the test frame with a clean size pulse

Default

Reset

Scaler 100 · Beat

The factory state and the instant undo. One clean bounce on the beat, everything else off.

Subtle preset: a gentle, barely-there pulse

Subtle

Subtle

Scaler 35 · Loudness

A gentle breathing pulse that follows the energy of the mix. For when the music should be felt, not seen.
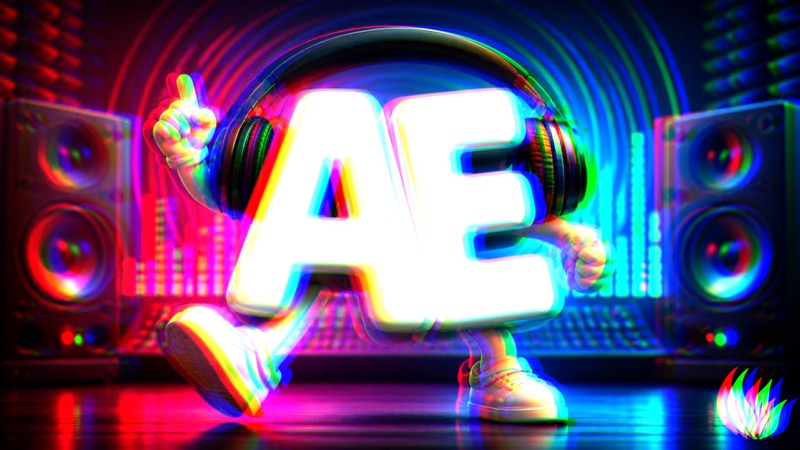
Chroma Drift preset: soft color fringing and glow

Chroma Drift

Subtle

RGB Split 35 + Bloom 35 · Mid

No size movement at all, just soft color fringing and glow riding the body of the mix. Dreamy without being busy.

Beat Bounce preset: a full-strength pulse on the beat

Beat Bounce

Beat-Synced

Scaler 100 + Glitch 15 · Beat

The full-strength bounce with a flicker of glitch on every hit. Default's louder cousin, and the go-to for anything upbeat.

Club Strobe preset: pumping frame with a strobe flash

Club Strobe

Beat-Synced

Scaler 60 + Strobe 120 (soft) · Beat

A pumping frame under a soft strobe. The club-wall look, tuned to stay watchable for a whole section.

Subwoofer preset: the frame punching in on bass hits

Subwoofer

Bass

Zoom Pulse 100 + Shakers 15 · Bass

The kick drum hits the camera. Zoom punch plus a light rattle, driven entirely by the low end.
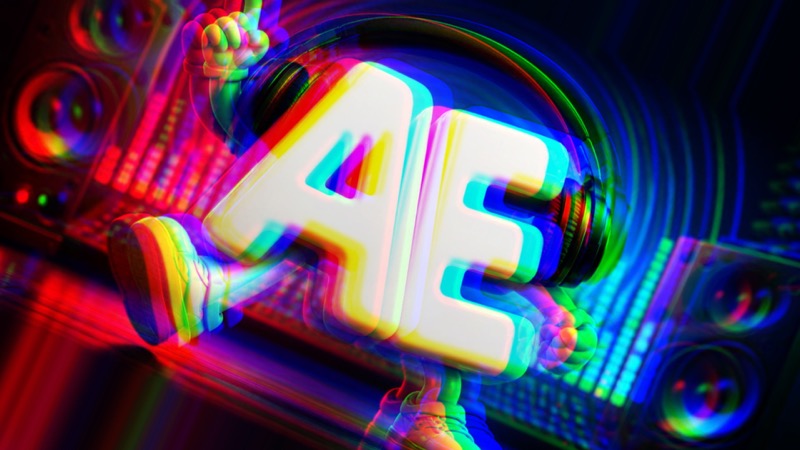
Acid Wobble preset: spinning, pulsing, color-split frame

Acid Wobble

Bass

Spinner 100 + Zoom Pulse 25 + RGB Split 75 · Bass

The frame leans, breathes, and fringes with the bassline. Wobbly in the best possible way.
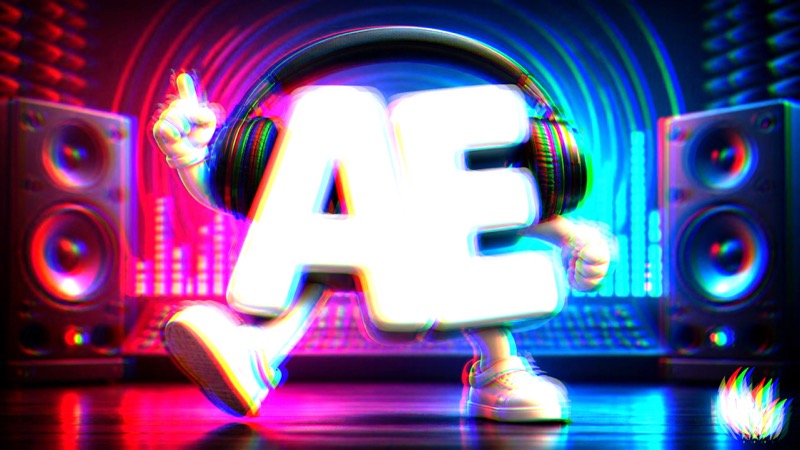
Shimmer preset: glowing highlights sparkling with the treble

Shimmer

Shimmer

RGB Split 25 + Bloom 80 · Treble

The top end of the song turns into light. Hi-hats and cymbals make the frame sparkle and glow.
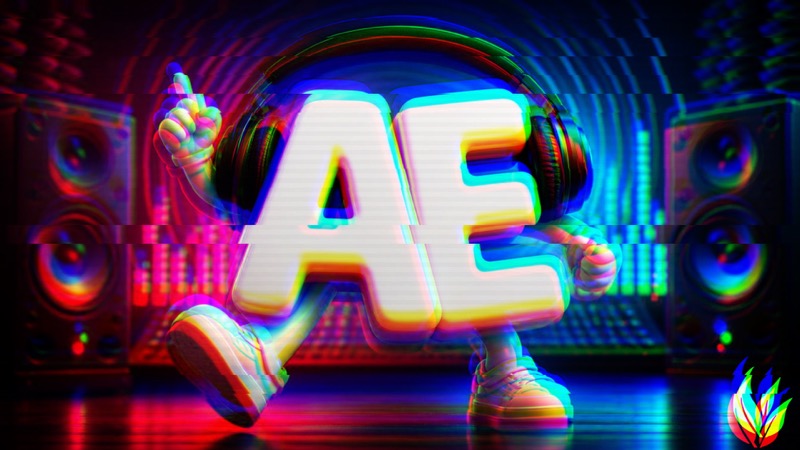
Hi-Hat Glitch preset: vertical color tears flickering with the hi-hats

Hi-Hat Glitch

Shimmer

RGB Split 80 (90°) + Glitch 40 · Treble · Intensity 75

Vertical color tears and digital slices flickering with the hi-hats. The one preset that eases Intensity back, because the top end is busy.

Energy Blast preset: pulsing, punching, glowing frame

Energy Blast

Maximal

Scaler 50 + Zoom Pulse 100 + Bloom 75 · Loudness

Pulse, punch, and glow, all riding the overall energy. Big without tipping into chaos.
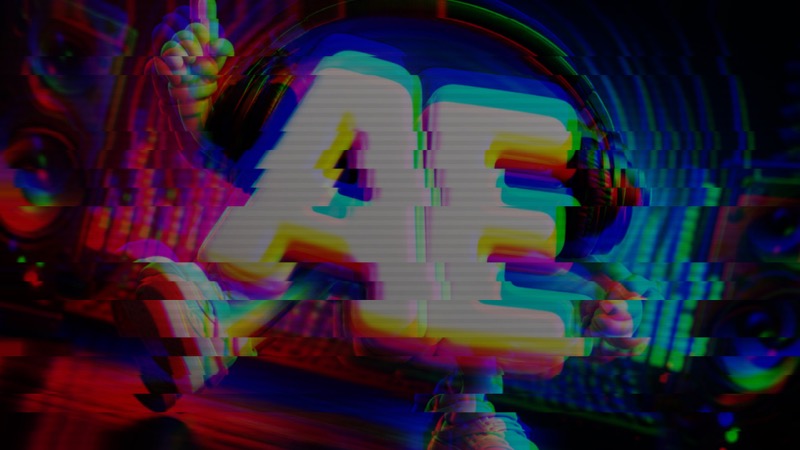
Rave preset: strobing, spinning, glitching frame

Rave

Maximal

Strobe + Spinner + Shaker + Zoom + RGB + Glitch + Bloom · Beat

Seven effects at once, locked to the beat. The full warehouse-at-2am experience. Use responsibly, or do not.

Melt preset: the frame smearing and tearing into color

Melt

Maximal

Spinner 180 + RGB Split 400 (45°) + Glitch 150 + Bloom 50 · Loudness

RGB Split pinned at maximum while the frame spins and tears. For when the video should look the way the drop feels.

Make it yours

Saving your own presets

Built a look you love? Save it and reuse it anywhere.

  1. Dial in the look until it is right.
  2. Open the Presets menu at the top of the inspector and choose Save.
  3. Give it a name. It now appears in the menu right alongside the built-in ones, and you can rename or delete it from there too.

Where your presets live

Each preset you save is a small file on your Mac under Library ▸ Application Support ▸ Herbistry ▸ Audio Effector ▸ Presets in your home folder. (That Library folder is hidden by default: in Finder, hold Option and open the Go menu to see it.) Because presets live there and not inside one project, your looks follow you across every project, and you can hand a preset file to a teammate so they get the exact same look.

Two kinds of "preset"

Audio Effector presets vs. Final Cut presets

This trips people up, so it is worth being clear. There are two separate places a preset can live, and they save different things.

Audio Effector presets

Inside the plugin · the Presets menu
  • Saves the look: which effects are on, strengths, React To, transform.
  • Never saves the song, so one look works across every project and track.
  • Travels with you. Available in every project, and the file can be shared.
  • Best for: the look itself, the thing you want to reuse everywhere.

Final Cut Pro presets

Inside Final Cut · Save Effects Preset
  • Saves the whole effect on the clip, including keyframes and any other effects stacked on it.
  • Lives in Final Cut's library. Only available inside Final Cut Pro.
  • Re-apply it to other clips to repeat the exact treatment.
  • Best for: remembering the whole clip treatment, not just the Audio Effector controls.

Rule of thumb

Use an Audio Effector preset when you want to reuse a look anywhere. Use a Final Cut preset when you want Final Cut to remember the entire setup on a clip so you can stamp it onto the next one.

Cheat sheet

Quick reference

Every slider at a glance, from one end to the other.

ControlLow endHigh end
Intensity0%: nothing moves200%: everything at double strength
Sync ToClip Head: song starts with the clipTimeline: cut freely, stays locked
Audio Sync0: song starts at the frontHigher: song starts that many seconds in
Sync FramesFewer: nudge earlier by framesMore: nudge later by frames
Min / Max LevelMin up: quiet parts ignoredMax down: full blast comes sooner
BPM30: slow march300: hummingbird
Song BPM½ / ⅓ / ¼: slower multiples2×: double the detected tempo
Beat Nudge0: on the beat1: a full beat late (0.5 = off-beat)
Build On / Off0: no ramp, full from frame oneSeconds: reaction eases in / out
Scaler0%: still400%: huge pumping zoom
Strobe0%: no flash400%: full light show
Spinner-400%: max spin, counter-clockwise+400%: max spin, clockwise
Shaker Pan-400%: full shake, leads left+400%: full shake, leads right
Shaker Tilt-400%: full shake, leads down+400%: full shake, leads up
Zoom Pulse0%: no punch400%: slammed every hit
RGB Split0%: channels glued400%: full separation
Glitch0%: clean signal400%: datamosh meltdown
Bloom0%: no glow400%: the frame breathes light

Before you install

System requirements

Audio Effector is a Mac video effect. Here is what you need.

Operating system
macOS 13.5 or later
Ventura and up.
Works in
Final Cut Pro 10.8 / Motion 5.8 or later
As a clip effect and as an adjustment-layer Title.
Mac type
Apple Silicon Mac
Runs natively on M1, M2, M3, and later.
Installing
Through FxFactory
Install, buy, and unlock in the free FxFactory app.

Get help

Stuck on something?

Trouble installing, syncing, or unlocking Audio Effector? Reach out and we'll sort it.

Contact support →