 Fordee
Guide · Final Cut Pro
How to add a music visualizer in Final Cut Pro
You've got a track and a video, and you want those bars bouncing along with the music, the way every good music video, lyric video, and podcast clip does it. Good news: it's a quick job in Final Cut once you know the one trick, it's a generator, not a filter. Here's the whole thing.
What a music visualizer actually is
A music visualizer is on-screen motion that moves with your audio: spectrum bars, a waveform, radial rings, a bouncing line. You feed it your track, and the visuals react to it as it plays.
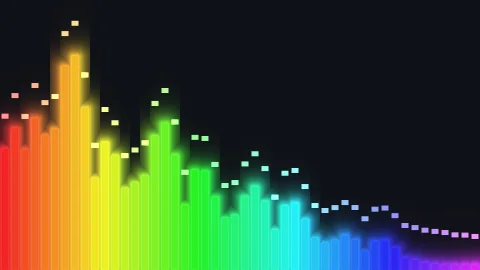
You've seen it a thousand times. The bars that jump on the bass in a music video. The waveform riding under a podcast clip. The circle that pulses on the beat in a lyric video. That's all a visualizer, audio turned into something you can watch.
Under the hood it's reading the sound: the lows drive one part, the mids another, the highs sparkle up top. When the track hits, the picture hits with it. Done right, it makes a static video feel alive, and it's the difference between a track sitting flat on screen and a track that looks like it sounds.
Why Final Cut needs a plugin for it
Final Cut Pro doesn't ship a generator that listens to your audio and moves with it. You either keyframe the motion by hand, or you add a generator plugin that does the reacting for you.
Final Cut has generators, backgrounds, shapes, all kinds of things you can drop on the timeline. What it doesn't have is one that hears your song. So the honest options are two.
Option one, you animate it yourself. Keyframe a bar's height up and down, over and over, in time with the music, for the length of the track. I've done it. It's a full afternoon and your soul leaves your body somewhere around the second chorus. It works, but nobody should have to.
Option two, you use a generator plugin built for this. It analyzes the audio once and drives the whole thing itself, no keyframing. That's the route this guide takes, because it's the one that gets you a finished visualizer in a couple of minutes instead of a couple of hours.
Set it up in Final Cut
Add the visualizer as a generator, put your footage or a background on the track right below it, then point it at your song. No song in the project? Set a BPM and it moves on its own.
Here's the part that trips everyone up, so we'll get it out of the way first: this is a generator, not an effect you drop on a clip. We add it from the generators browser and it lands on the timeline as its own layer.
Next, the layering. We put our footage, or a solid color, or whatever background we want, on the track below the generator. The visualizer plays over the top of it, so whatever sits underneath is what shows through behind the bars. Background on the bottom, visualizer on top, that's the whole stack.
Then we feed it the music. We point it at our song, the same file we cut into the timeline, and it reads the audio and starts moving with it: bass on the low bars, melody through the middle, highs up top. If our track doesn't start at the very top of the timeline, we nudge it into sync so the bars land on the actual beats and not a second early.
No music in the project yet, or we just want a vibe? We set a BPM instead and it dances to that beat on its own, no audio required. Either way, boom, moving visualizer.
Dial in the look
Once it's moving, the look is yours: the style of visualizer, the colors, and any animation riding on top. Start from a preset if you want a finished look fast.
First the style. Tall spectrum bars are the classic, but you're not stuck with them, there's mirrored center bars, LED meters, a dot-matrix grid, a thin line, a filled area wave, circular radial rings, and an oscilloscope waveform. Same audio, completely different vibe depending on which one you pick.
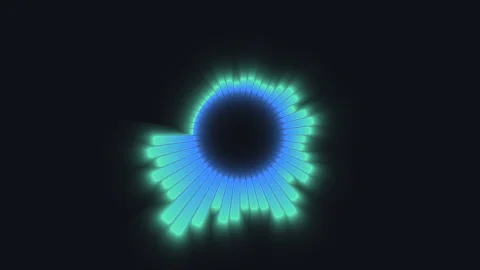
Then color. Rainbow out of the box, a set of built-in palettes if you want a specific mood, or dial in your own colors to match the track's artwork. And if you want to push it, there's a rack of animation effects that ride over the whole thing, glitch, shake, a bass-pump zoom, a kaleidoscope, and more, and you can stack a couple at once for the layered looks.
Don't want to build it from scratch? Start on a preset. One click drops a finished look, clean and simple or full psychedelic, and every knob is still right there to tweak from. Get it close with a preset, then make it yours.
We built one for exactly this. It's Audio Effector: Equalizer.
It's a generator for Final Cut Pro and Motion that turns your track into bars, waveforms, and radial rings that actually move with the audio. Ten styles, rainbow color, a stack of animation effects, and a beat mode for when there's no song loaded. Real-time on Apple Silicon, and a free trial so you can build your look before you spend a cent.
Free trial. Every style and effect works.
The hard part used to be the keyframing. Now the hard part is picking which style, and honestly that's a much better problem to have.